Purchase Orders & Invoices — Now Fully Customizable
Your printed documents should look like they came from your business, not a generic template.
We've heard from teams who send purchase orders to suppliers and invoices to customers on a daily basis: the default layout doesn't always match how you operate.
- Maybe you use different terms, like "Vendor" instead of "Supplier."
- Maybe you need memos on your packing slips but not on your invoices.
- Maybe your documents just need your logo on them so they look professional when they land on someone's desk.
Over the past few months, we've been rolling out customization options for your order documents — from uploading logos to renaming labels. Here's a full rundown of everything you can now configure in BoxHero!
What's New
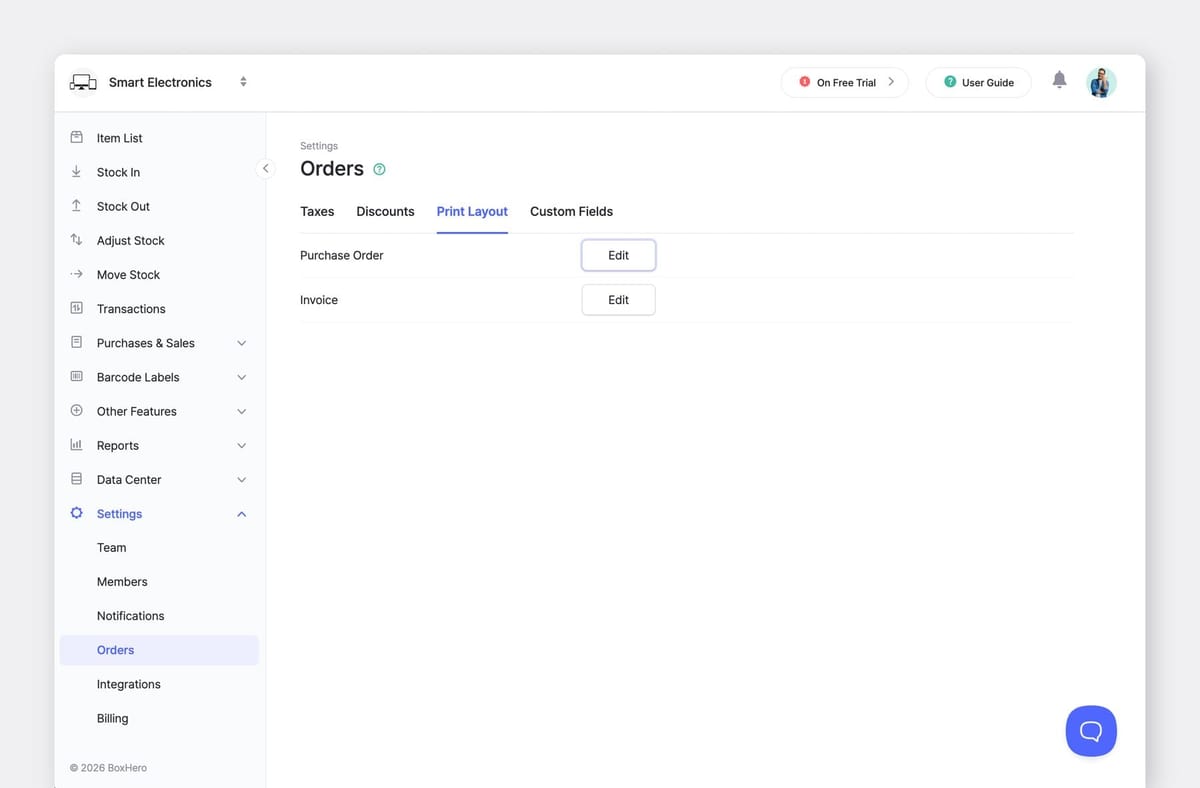
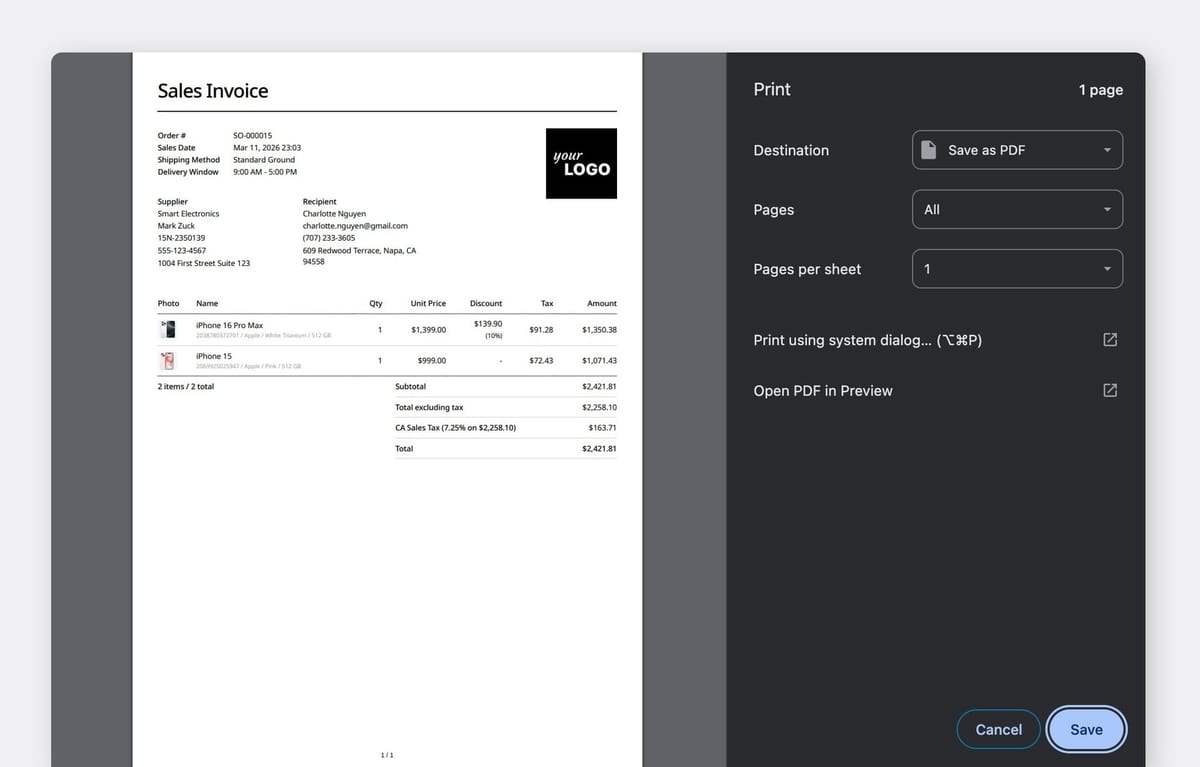
Print Layouts give you full control over how your purchase orders and sales invoices look when you print, email, or save them as PDFs.
You can set up separate templates for each document type by going to Settings > Orders > Print Layout.
Here's what you can customize:
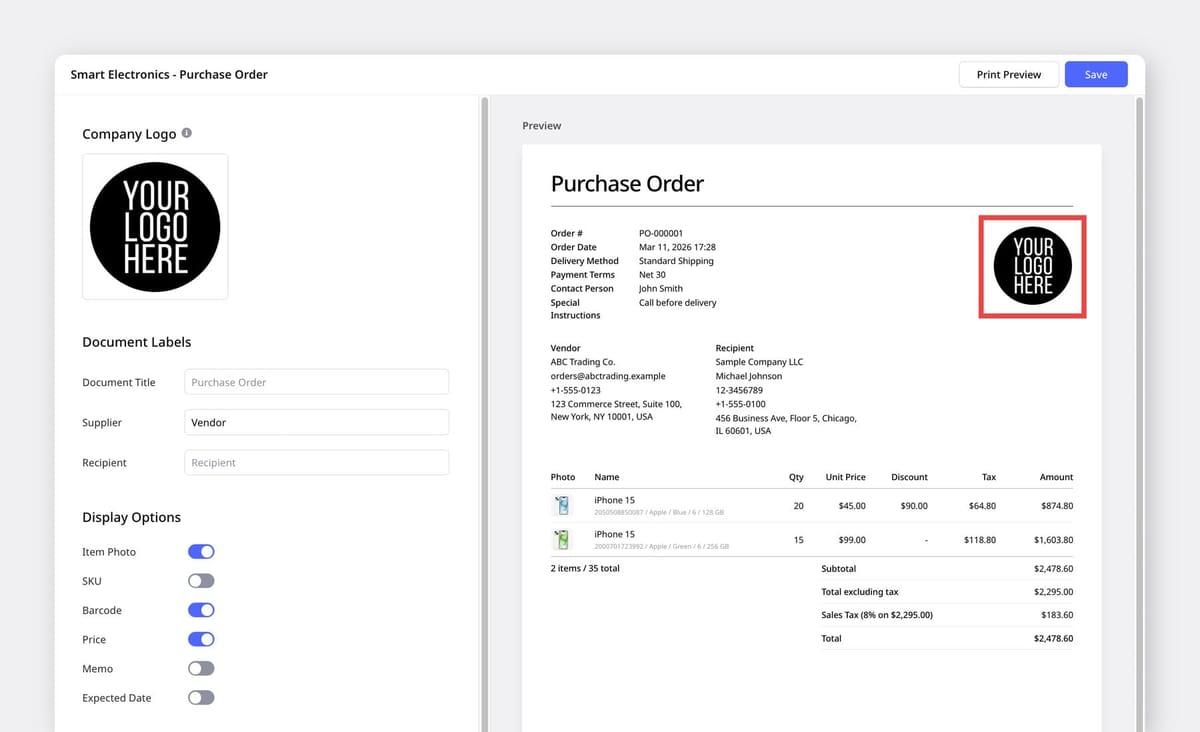
1. Your Brand, Front and Center
Upload your company logo (up to 3 MB) and it'll appears in the top-right corner of every printed document. No more sending out blank-header invoices that look like they were made in a spreadsheet.
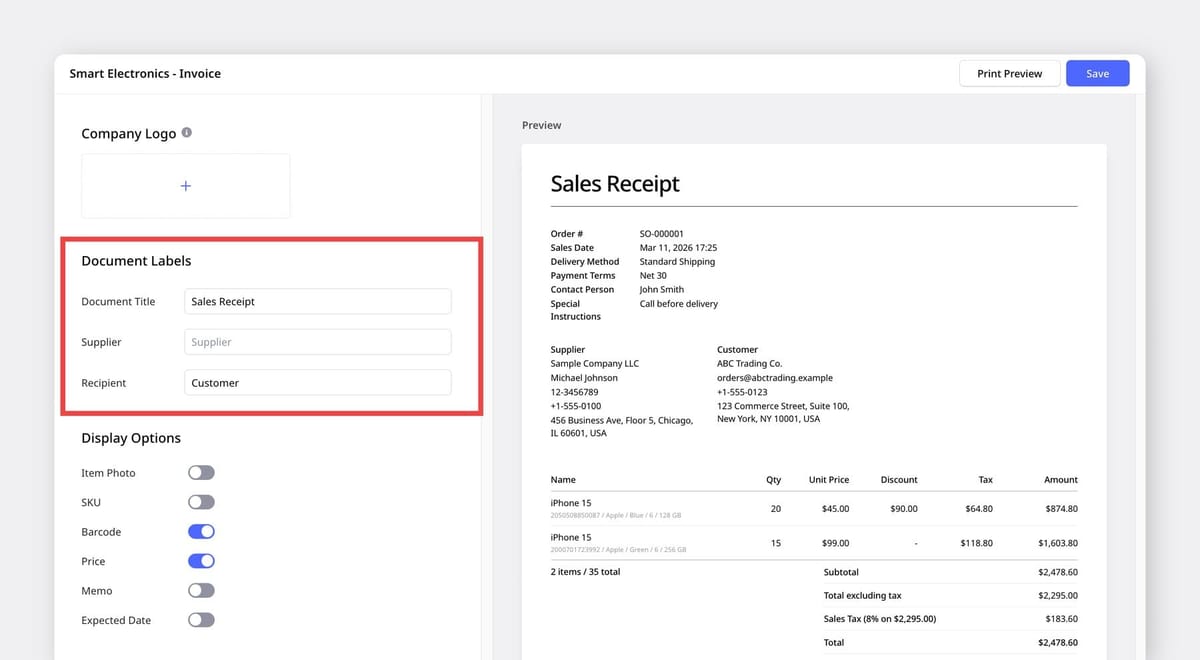
2. Rename Document Labels
Every business has its own language. With custom labels, you can rename the default terms on your printed documents to match the way your team actually talks:
- Document Title: Rename it to Packing Slip, Delivery Note, Sales Receipt, or Work Order.
- Supplier: Swap the term for Vendor, Seller, Warehouse, or From.
- Recipient: Change to Customer, Bill To, Ship To, or Buyer.
Settings > Team > Business Information. 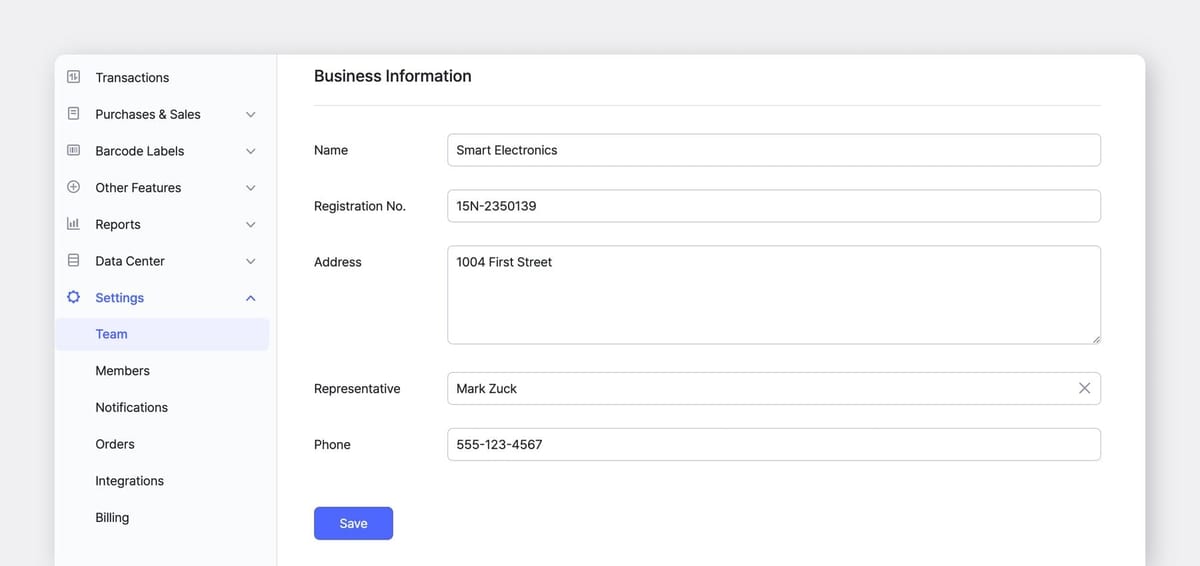
Data Center > Partners. Update those first so your documents display the right info.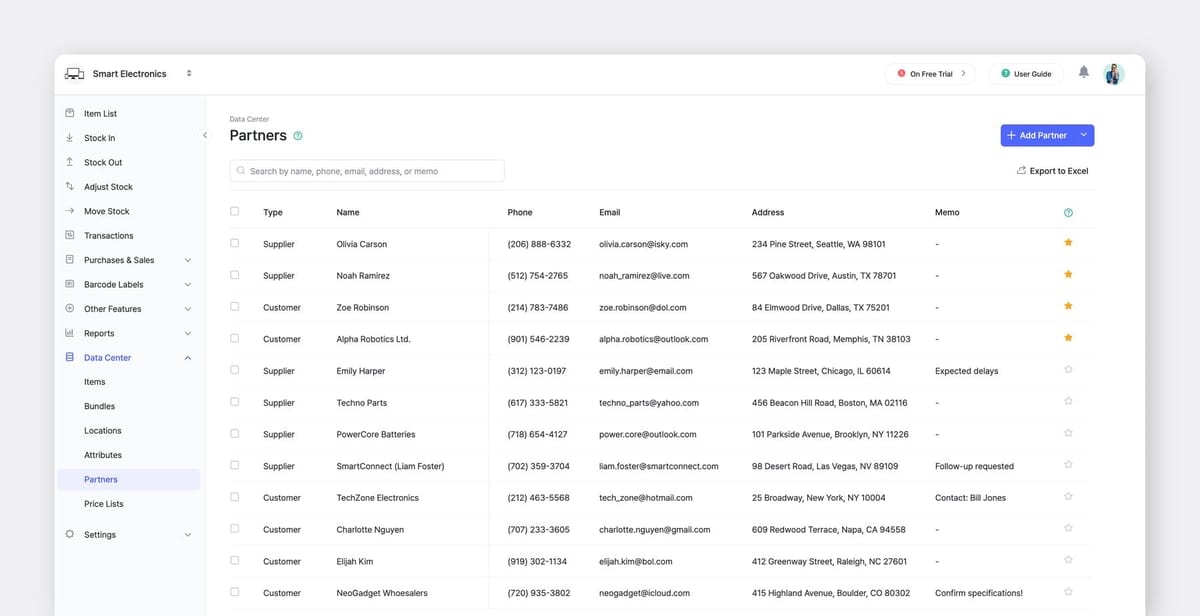
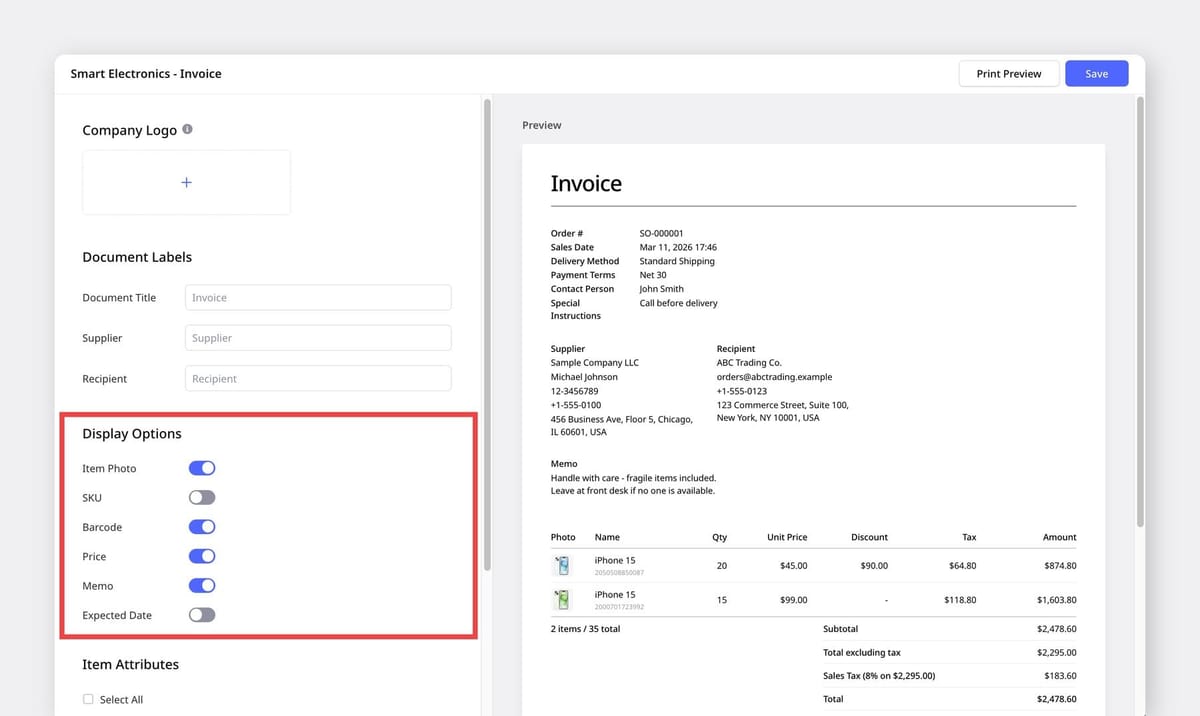
3. Choose Display Options
Toggle specific fields on or off depending on the document. Display options include:
- Item Photos: Helpful on packing slips for visual verification, optional on invoices.
- SKU: Keep it visible for internal documents, hide it on customer-facing ones.
- Barcode: Display barcode numbers alongside item details, if needed.
- Pricing: Show or hide line-item totals on invoices, including taxes and discounts.
- Memo: Include any notes or special delivery instructions. If your memos are for internal use only, turn this off so they won't appear on documents sent to customers or suppliers.
- Expected Date: Display expected receiving or shipping dates on your documents when delivery timelines need to be communicated.
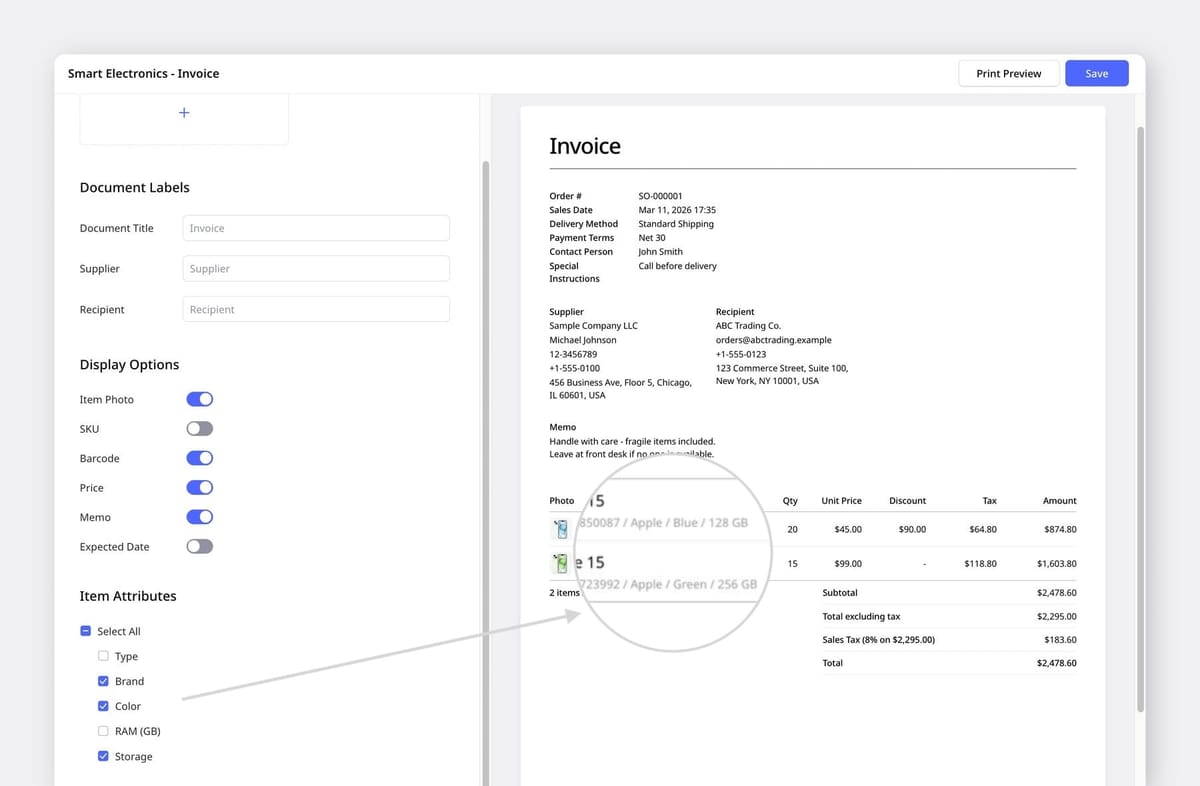
4. Show Item Attributes
Select which item attributes (like Brand, Size, Expiration Date, or any custom attribute you've created) appear in the item details section.
Only show the attributes your suppliers and customers actually need — it makes item information much easier to scan at a glance in your documents.
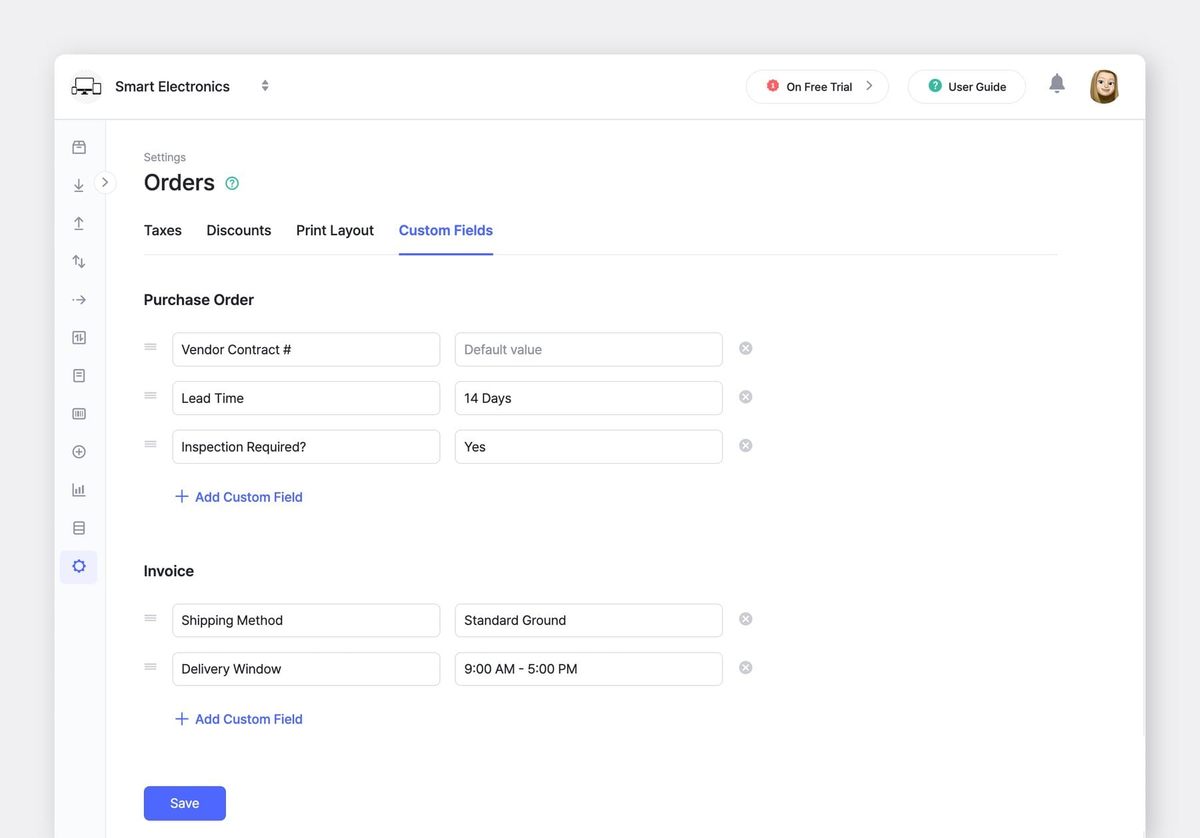
Bonus: Custom Fields for Extra Order Details
Need to include a contact person's email, payment terms, or bank account details on your orders? Custom fields let you add additional information that appears on every purchase order or sales order you create.
Save the fields you use most as defaults in Settings > Orders > Custom Fields, and they'll auto-populate every time your team creates a new order. It's great for standardizing details like payment instructions or internal reference numbers across your organization.
For more details on custom fields, refer to:

Putting It All Together
Ready to make these documents your own? Here’s a quick refresher.
- Go to
Settings>Orders>Print Layout. - Upload your logo, toggle your display options, and customize your labels.
- Set different templates for purchase orders vs. invoices.
- Preview your layout, then print, email, or save as PDF.
For a full walkthrough of all order settings (including taxes and discounts), check out our detailed guide.
Have questions about these features?
→ Reach out to our support team anytime at support@boxhero.io.