
Items
Items are the basic unit of products you manage in BoxHero. This page covers everything you can do with them — adding, importing, editing, organizing, and exporting.

Adding Items
Section titled “Adding Items”On Your Computer
Section titled “On Your Computer”- From the
Item List, clickAdd Item. - Or go to
Data Center>Itemsand clickAdd Item.
On Your Phone
Section titled “On Your Phone”- In the bottom menu, tap
Items, then tap the+(plus) icon in the bottom-right corner. - Enter your item details, set the starting quantity, and tap
Save.
Item Fields
Section titled “Item Fields”Whether you add items on the web or on mobile, these are the fields you'll fill in:
- SKU* — Short for Stock Keeping Unit, this is the item's unique identifier. BoxHero generates one automatically, or you can enter your own using any combination of letters, numbers, and special characters. Each SKU must be unique, and SKUs aren't case-sensitive.
- Name* — The primary name used to identify the item.
- Barcode — Add a barcode to look items up instantly by scanning. Enter an existing one (typed manually or scanned with a USB scanner or your phone camera), or click
Generateto create a random 13-digit number. - Photo — Upload an image for quick identification (max 3 MB). To add more than one photo, create a file-type attribute.
- Attributes — Add custom details like brand, size, or color to help categorize and filter your inventory.
- Quantity — Enter the starting stock. You can save an item at zero and add stock later through inventory transactions.
Using Excel
Section titled “Using Excel”Excel is the fastest way to work with your items in bulk. From Data Center > Items > Import from Excel, you can:
- Add new items from a spreadsheet.
- Edit the details and quantities of existing items.
- Update SKUs to replace the SKU codes on existing items.
Add Items via Excel
Section titled “Add Items via Excel”If you already have a spreadsheet of item details — or want to add many items at once — use Add via Excel to upload them all to BoxHero.
Download Excel Template
Section titled “Download Excel Template”- Go to
Data Center>Items. - On the top right, click
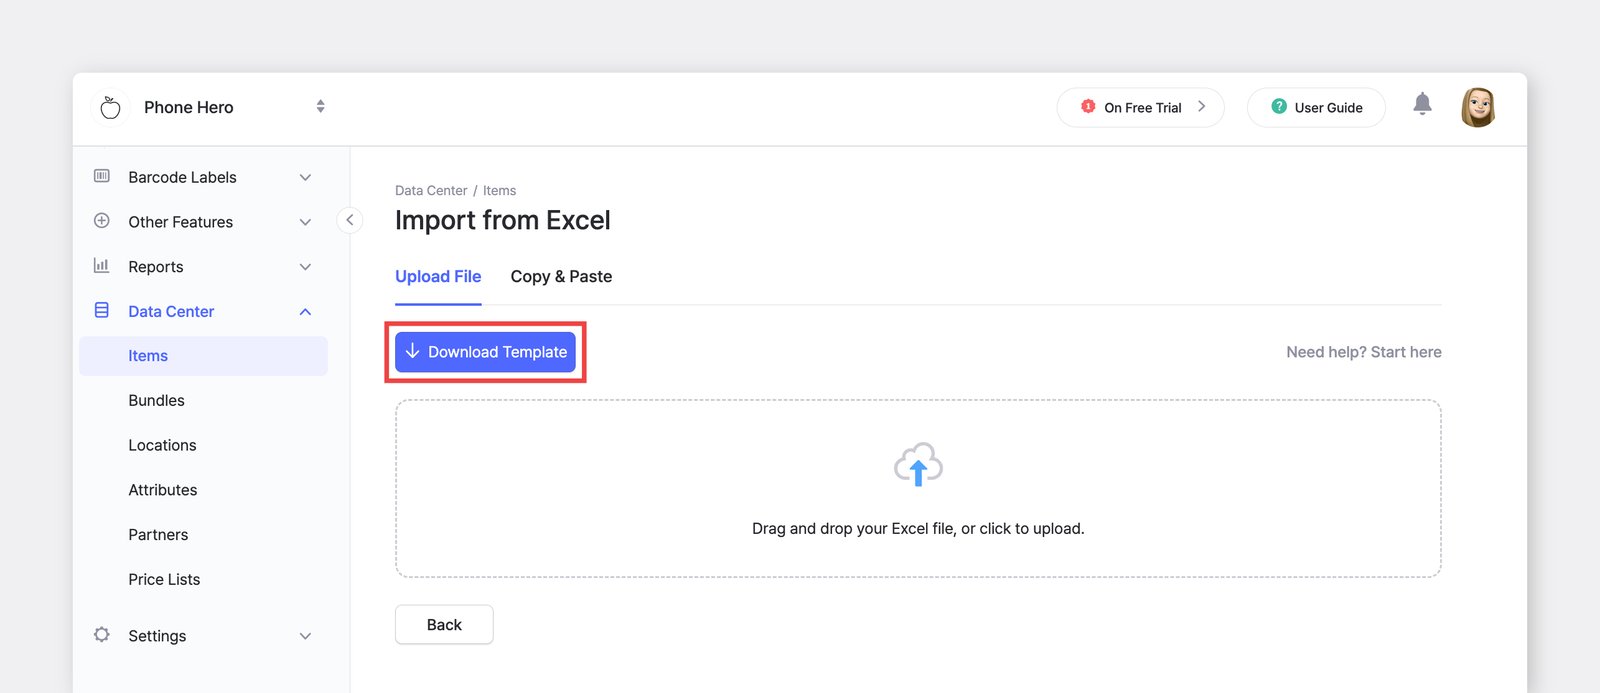
Import from Excel>Add via Excel. - Click
Download Template. The file is pre-formatted with the correct column structure for your team — including your custom attributes and locations.
- Go to
Review Excel Columns
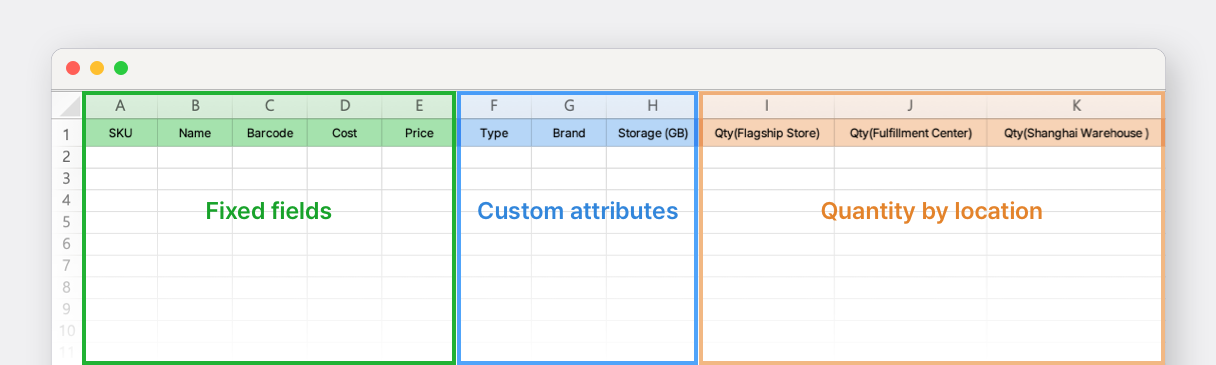
Section titled “Review Excel Columns”Open the downloaded file. You'll see three types of columns:
- Fixed fields: Built-in columns that can't be renamed or deleted.
(SKU, Item Name, Barcode, Cost, and Price) - Custom attributes: Attributes you've set up under
Data Center>Attributes. - Quantity by location: Locations you've set up under
Data Center>Locations.
- Fixed fields: Built-in columns that can't be renamed or deleted.
Fill in Item Data
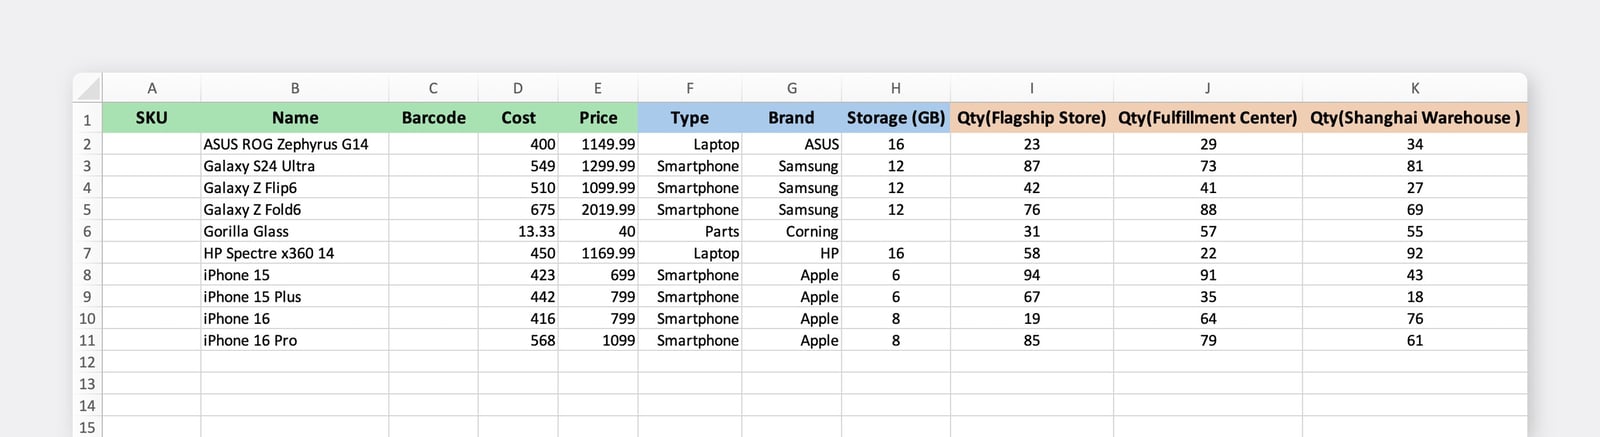
Section titled “Fill in Item Data”Enter your item details into the template, referencing the example row at the top of the file.
Upload and Confirm
Section titled “Upload and Confirm”- Return to the
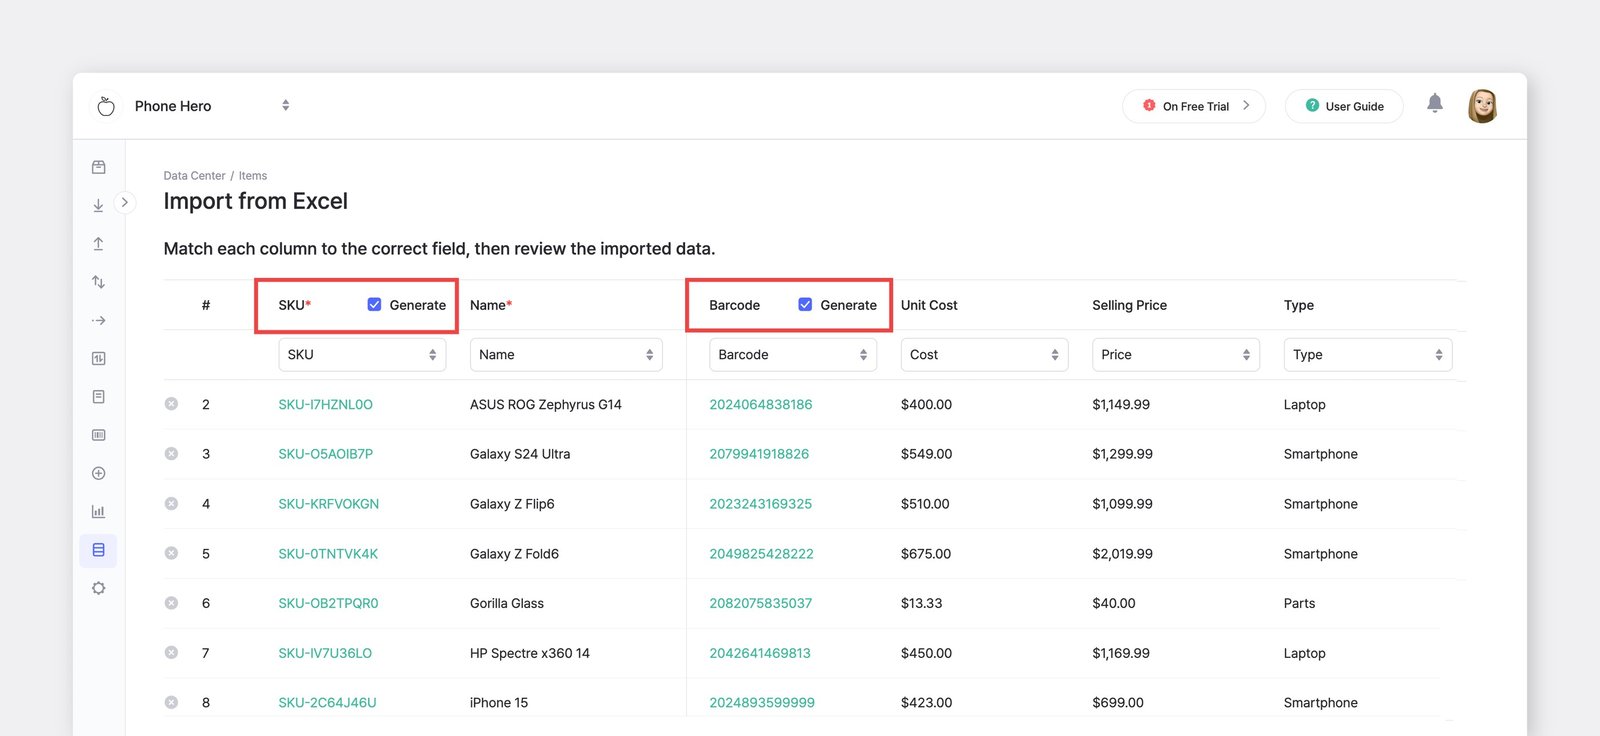
Add via Excelscreen and upload your completed Excel file. - Check
Generateto auto-fill any blank SKU or Barcode cells. - Review the items in the preview screen. Rows with errors are flagged — fix them in your Excel file and re-upload, or proceed with only the valid rows.
- Click
Doneto finish.
- Return to the
Edit Items via Excel
Section titled “Edit Items via Excel”Use Edit via Excel to change the details and quantities of many existing items in one pass. Unlike adding, this starts from a file of your current data, so you edit what's already there rather than entering items from scratch.
Download Current Data
Section titled “Download Current Data”- Go to
Data Center>Items. - On the top right, click
Import from Excel>Edit via Excel. - Click
Download Template. The downloaded file contains all your items currently in BoxHero, along with their details.
- Go to
Edit Excel File
Section titled “Edit Excel File”Change only the cells you need to update, then save the file.
For example, after a stock count at your "Houston warehouse," you might set every item's quantity there to "20." Just update that one column and leave the rest as they are.
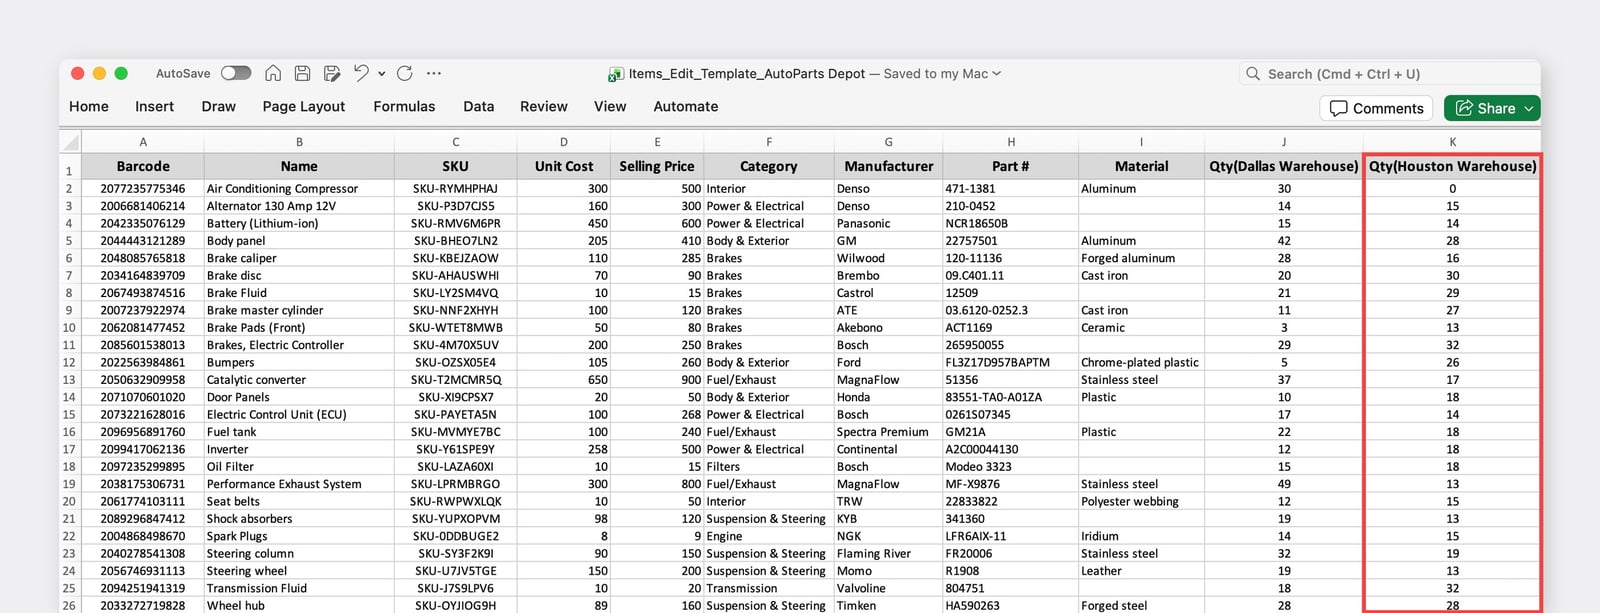
Before: The current "Houston Warehouse" quantities.
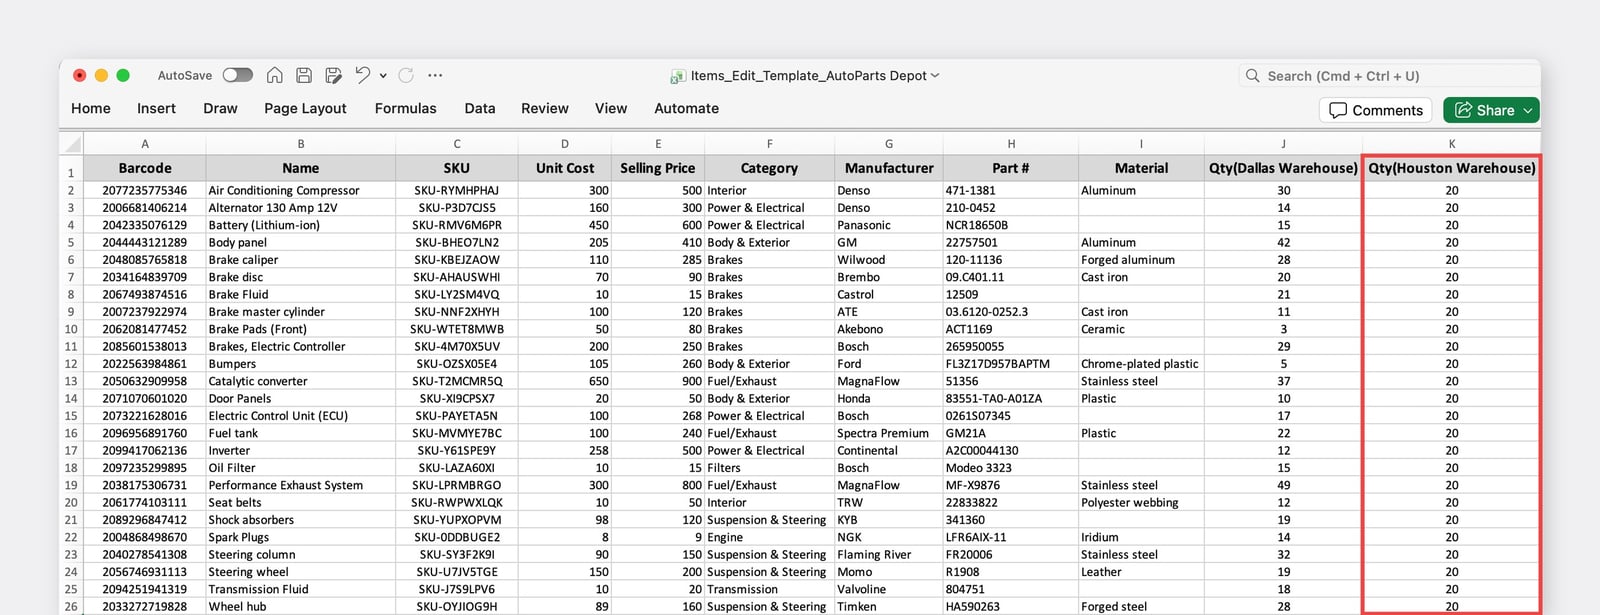
After: The whole column updated to "20."
Upload and Confirm
Section titled “Upload and Confirm”- Return to the
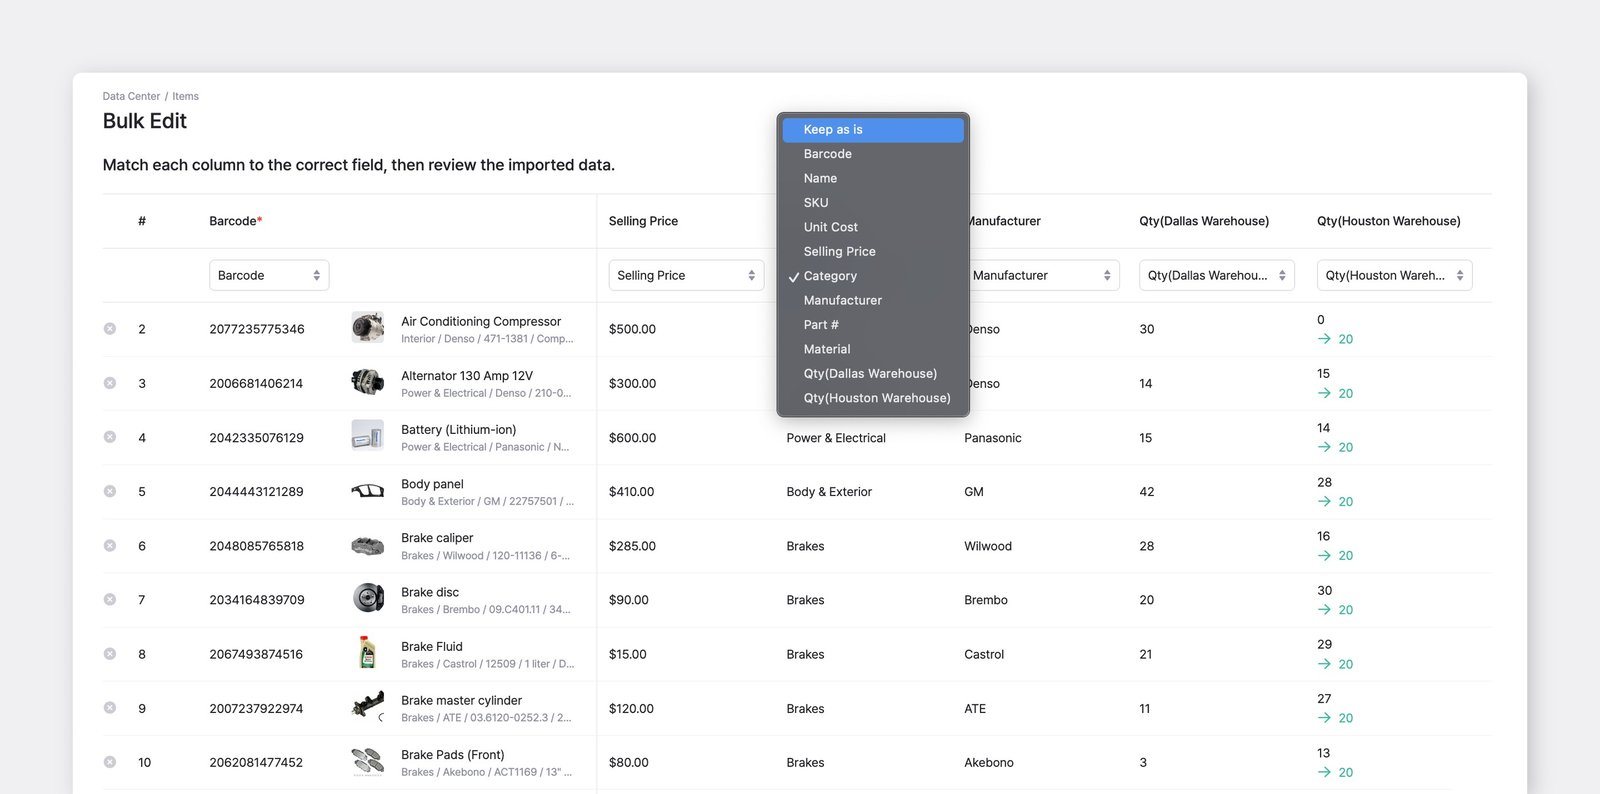
Edit via Excelscreen and upload your edited file. - For any column you didn't intend to change, select
Keep as isin the dropdown. This protects those fields from accidental changes, even if a cell was edited or cleared. - Review the changes in the preview, then click
Doneto apply them.
- Return to the
Update SKUs via Excel
Section titled “Update SKUs via Excel”Use Update SKUs via Excel to replace the stock keeping unit codes on existing items in bulk. Because BoxHero identifies items by SKU, this is the safe way to rename SKUs — a regular Edit via Excel would read a changed SKU as a different item.
Download Excel File
Section titled “Download Excel File”- Go to
Data Center>Items. - On the top right, click
Import from Excel>Update SKUs via Excel. - Click
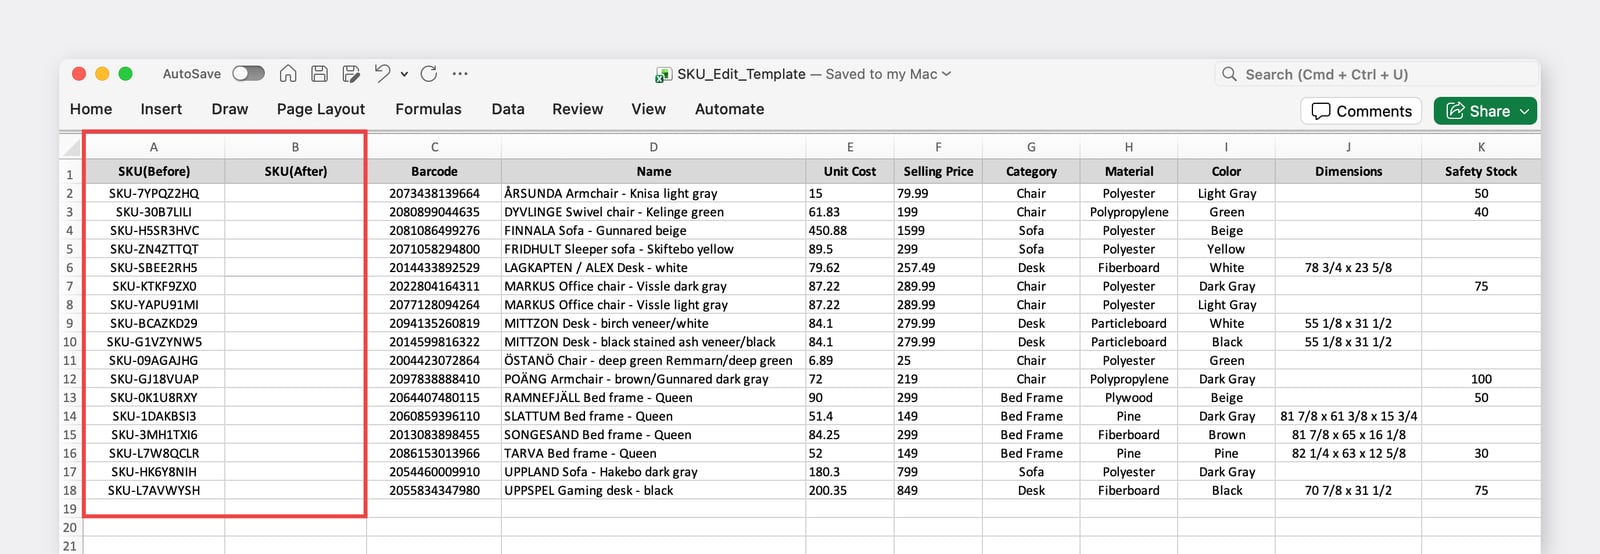
Download Template. The file lists every item in your team. Each row's current code is pre-filled in the SKU(Before) column, with an empty SKU(After) column beside it.
- Go to
Enter New SKUs
Section titled “Enter New SKUs”In the SKU(After) column, type the new code for each item you want to rename. Leave SKU(After) blank on any row you want to keep unchanged.
Upload and Confirm
Section titled “Upload and Confirm”- Upload the completed file on the
Update SKUs via Excelscreen. - Review the changes in the preview, then click
Done.
- Upload the completed file on the
Adding Item Variants
Section titled “Adding Item Variants”If an item comes in different options like size or color, use Item Variants to create all versions at once instead of adding them one by one.
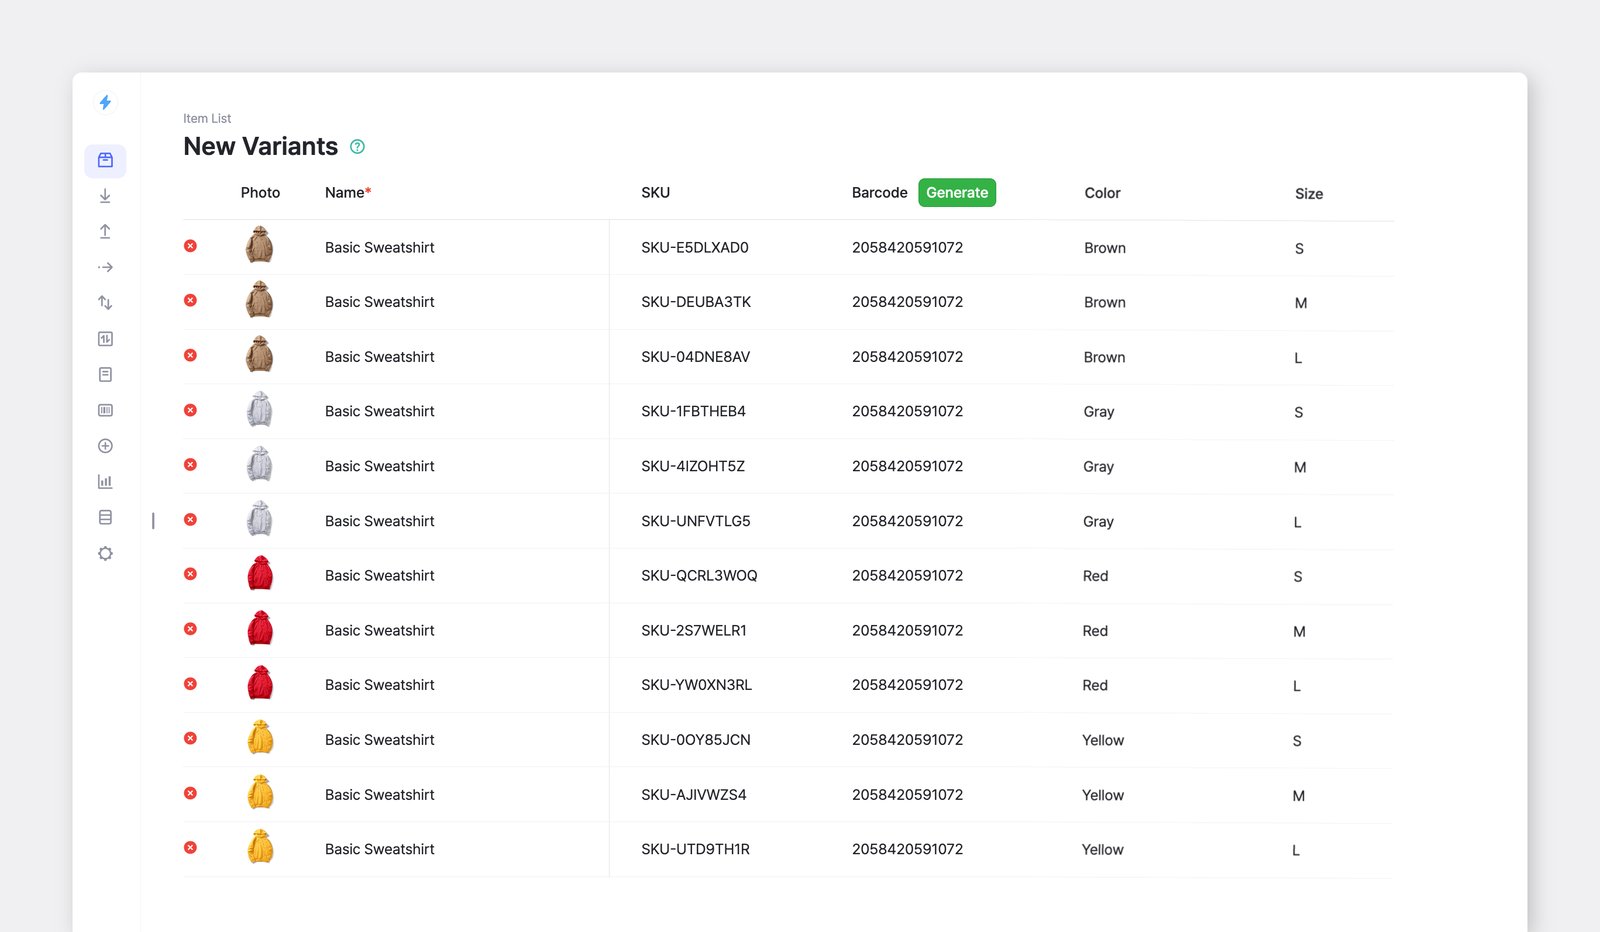
For example, if a sweatshirt comes in four colors and three sizes, it has 12 combinations. To add them all, go to Item List > Add Item > Add Item Variants.
| Brown | Yellow | Gray | Red |
|---|---|---|---|
| S | S | S | S |
| M | M | M | M |
| L | L | L | L |
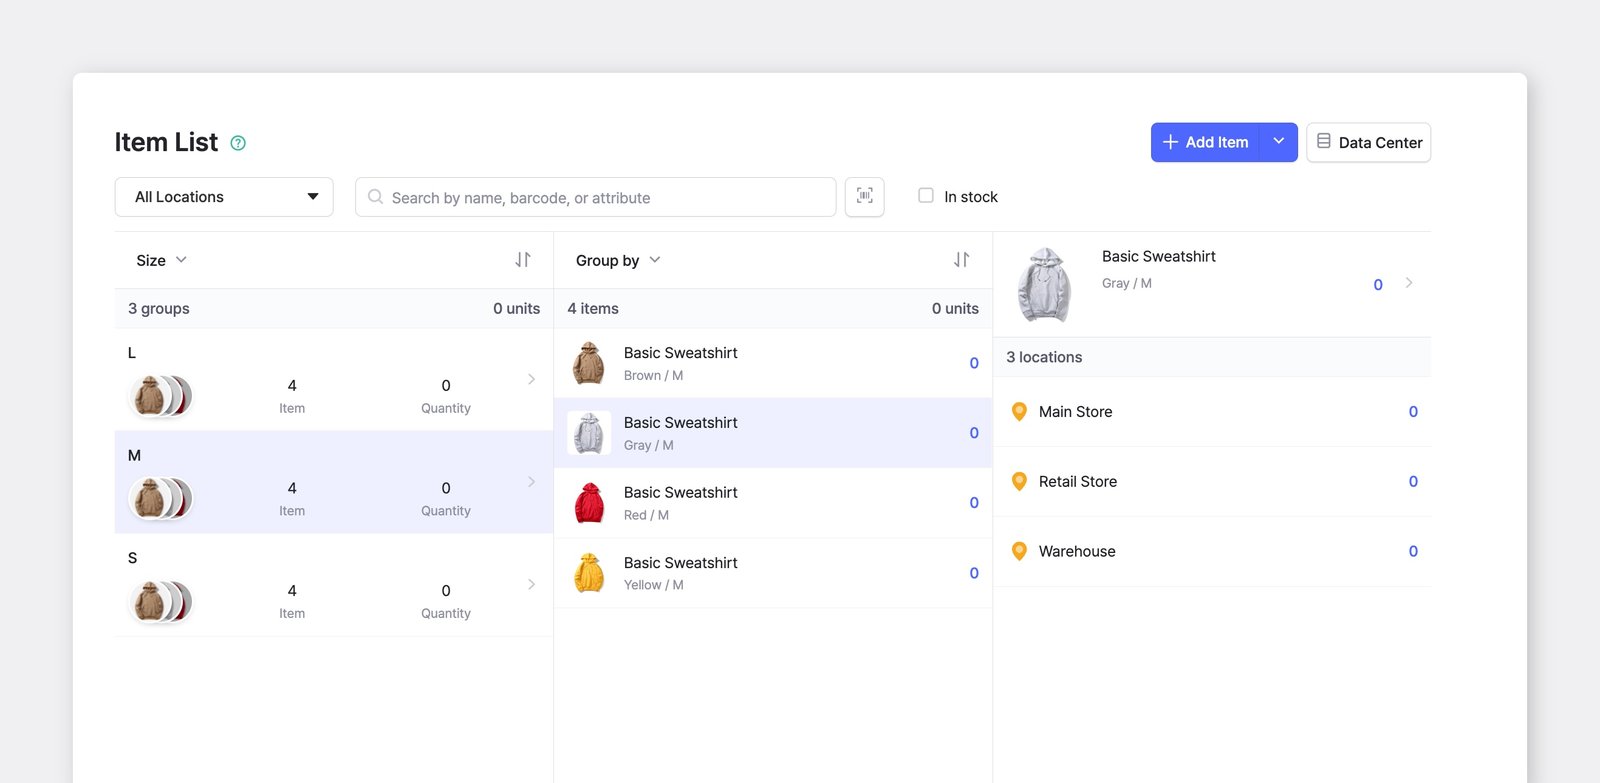
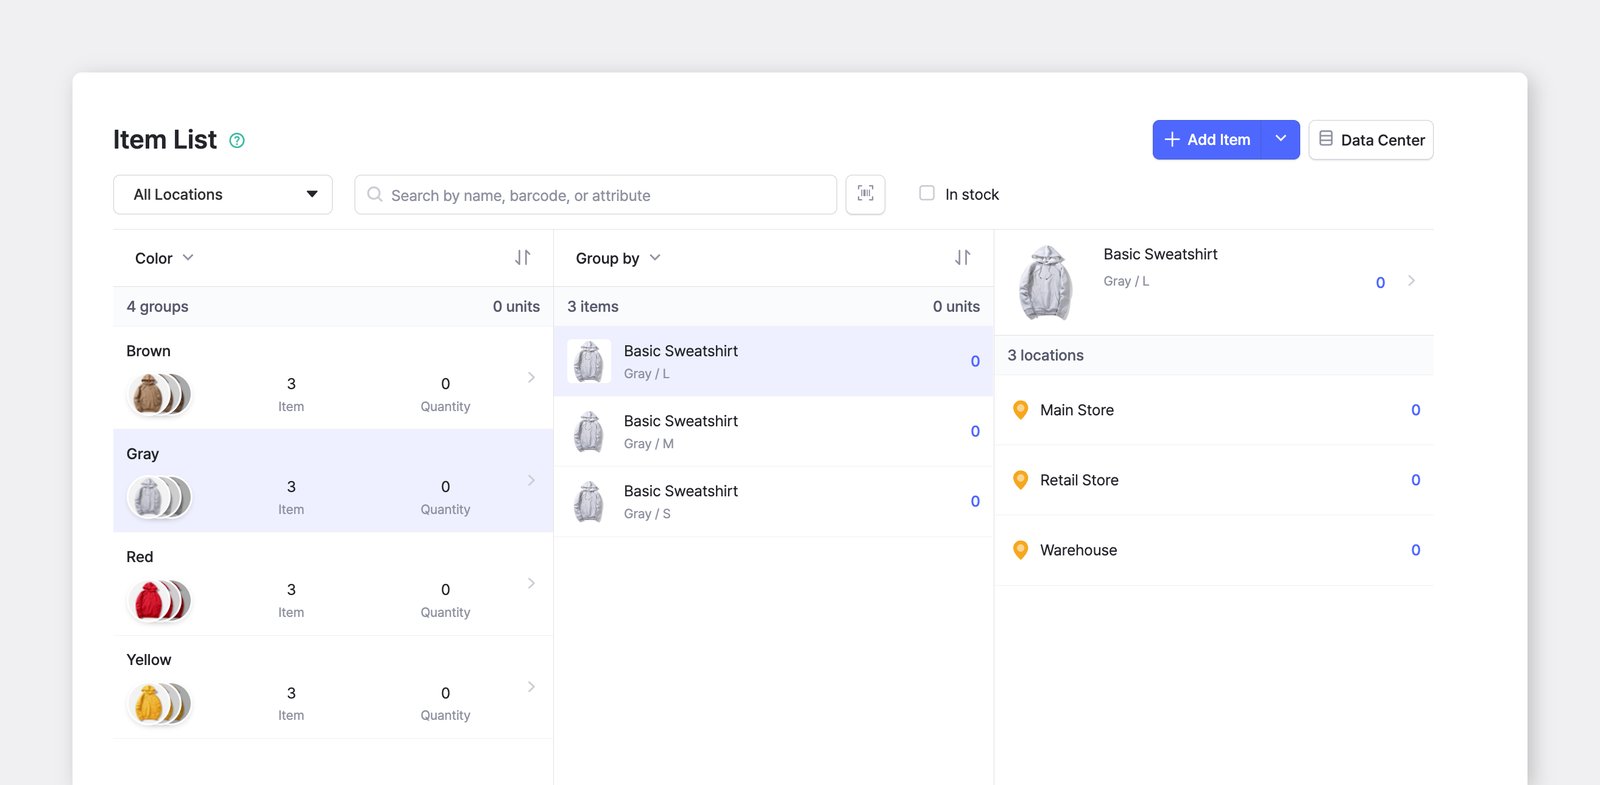
You can group item variants by attribute (e.g., Size or Color) in your Item List.
Editing Items
Section titled “Editing Items”Edit a Single Item
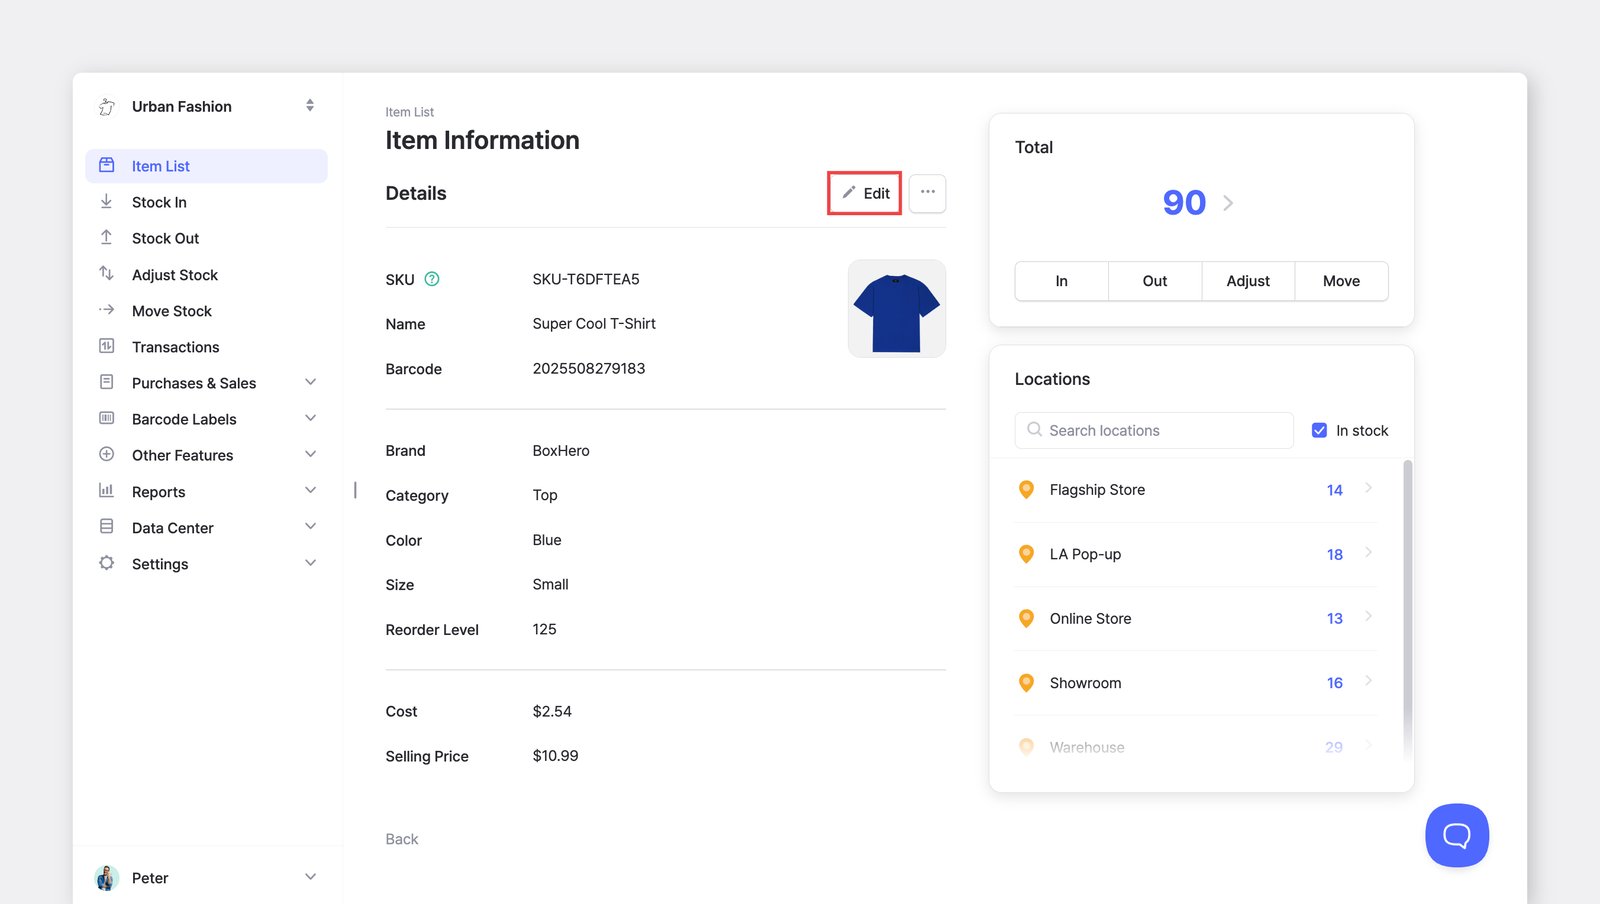
Section titled “Edit a Single Item”Select an item in the Item List and click Edit to make changes, or ... (more) to duplicate or delete it.
Edit Multiple Items
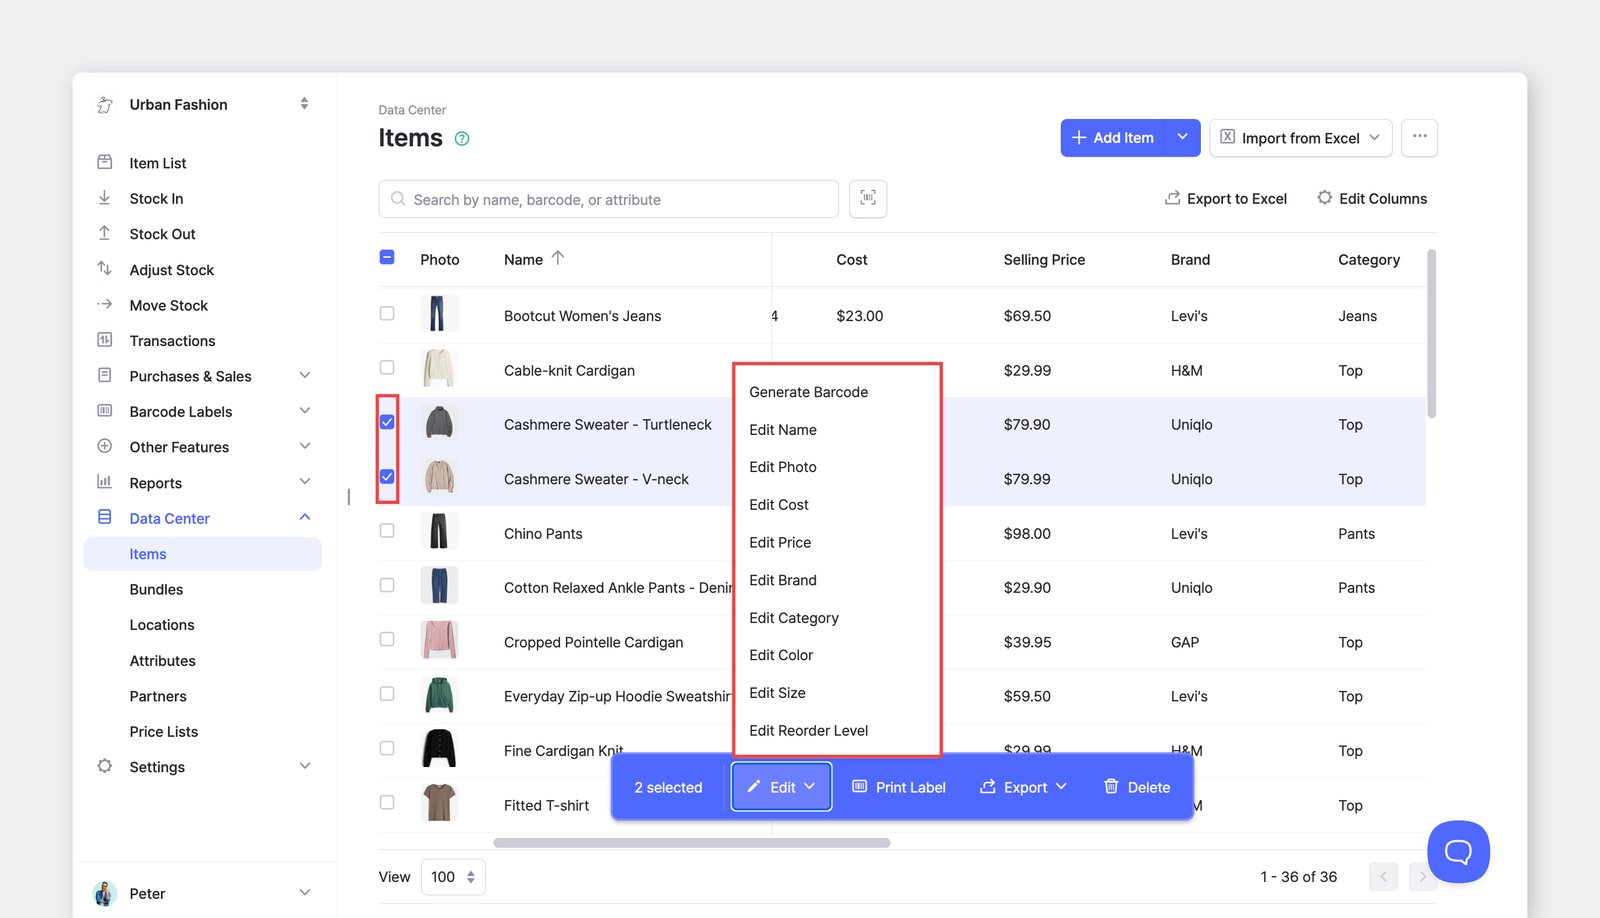
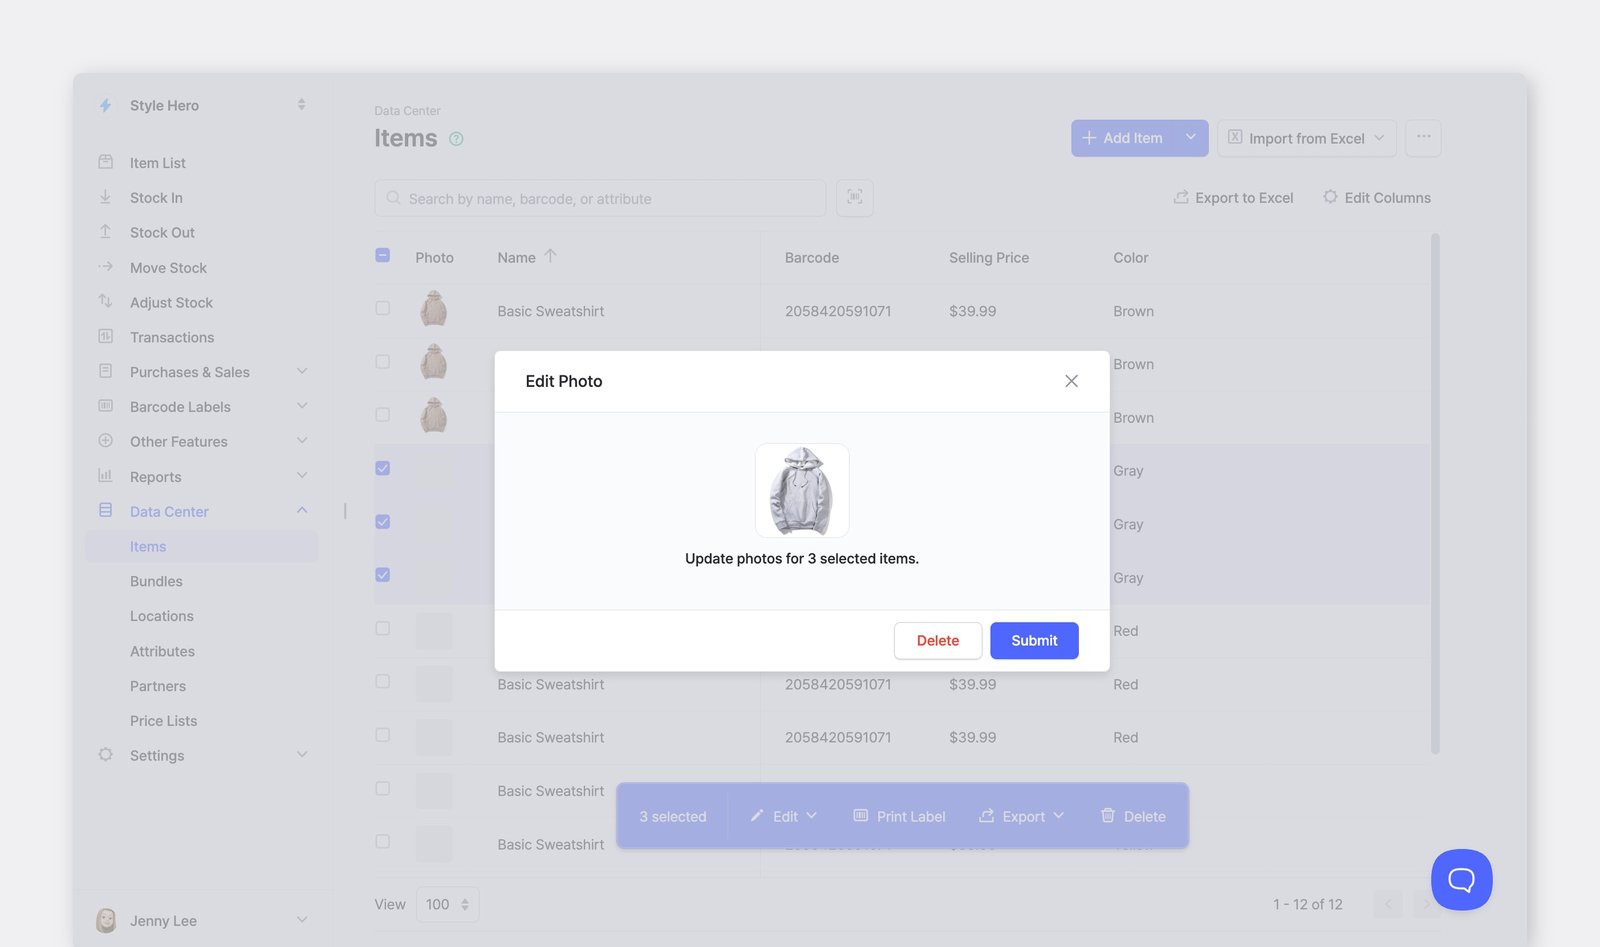
Section titled “Edit Multiple Items”To update many items at once, go to Data Center > Items. This is helpful when adding or modifying attributes across a large group of items.
Edit History
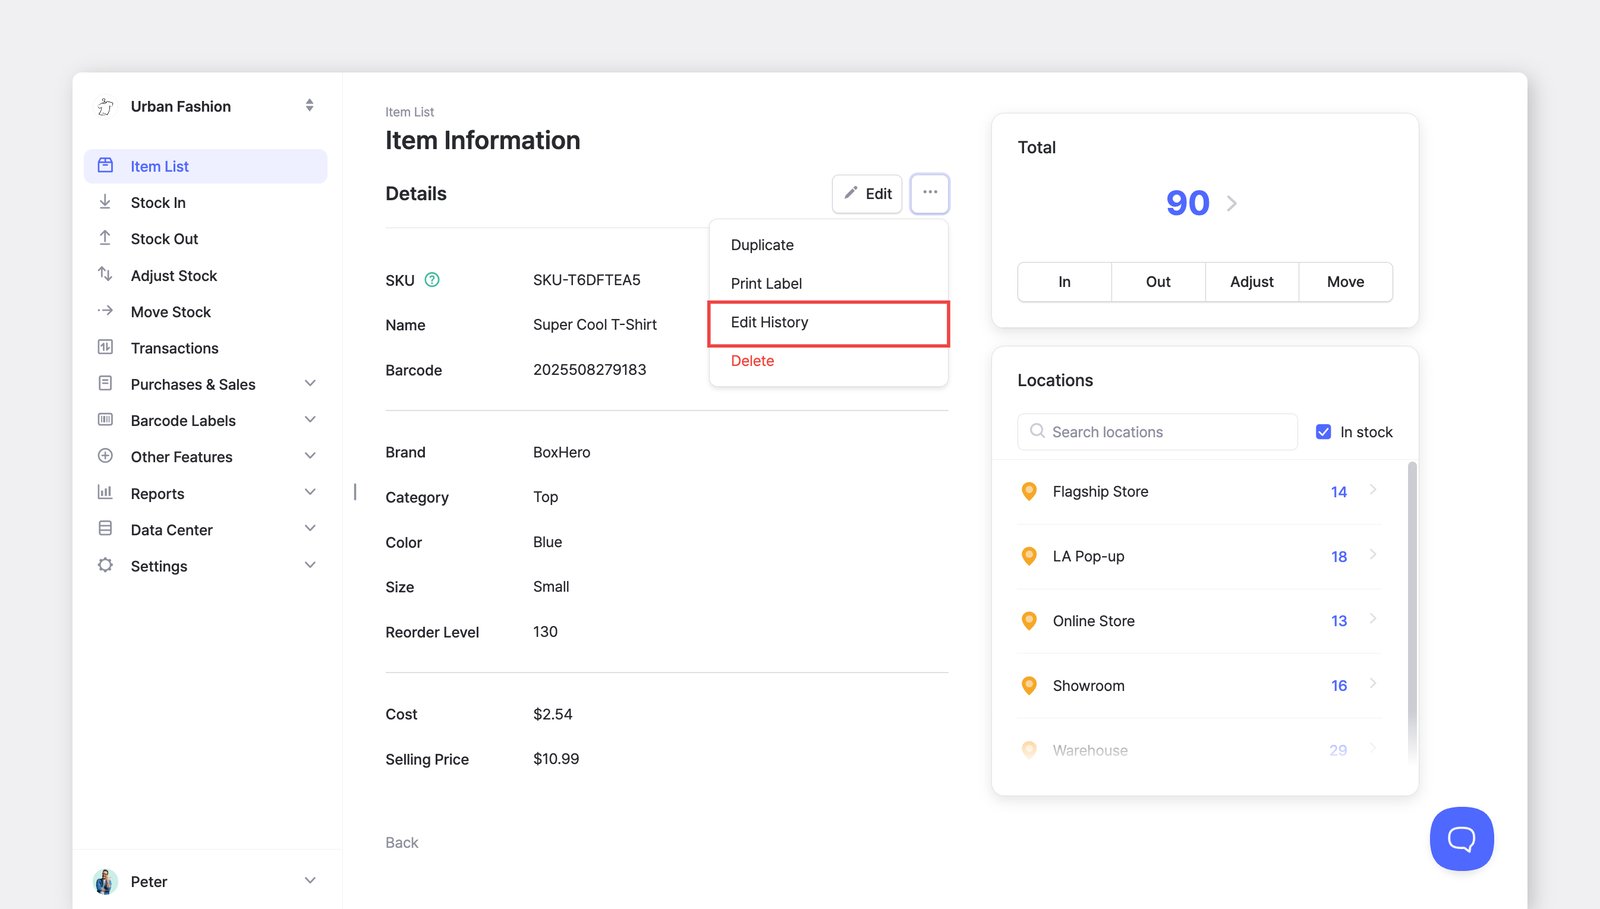
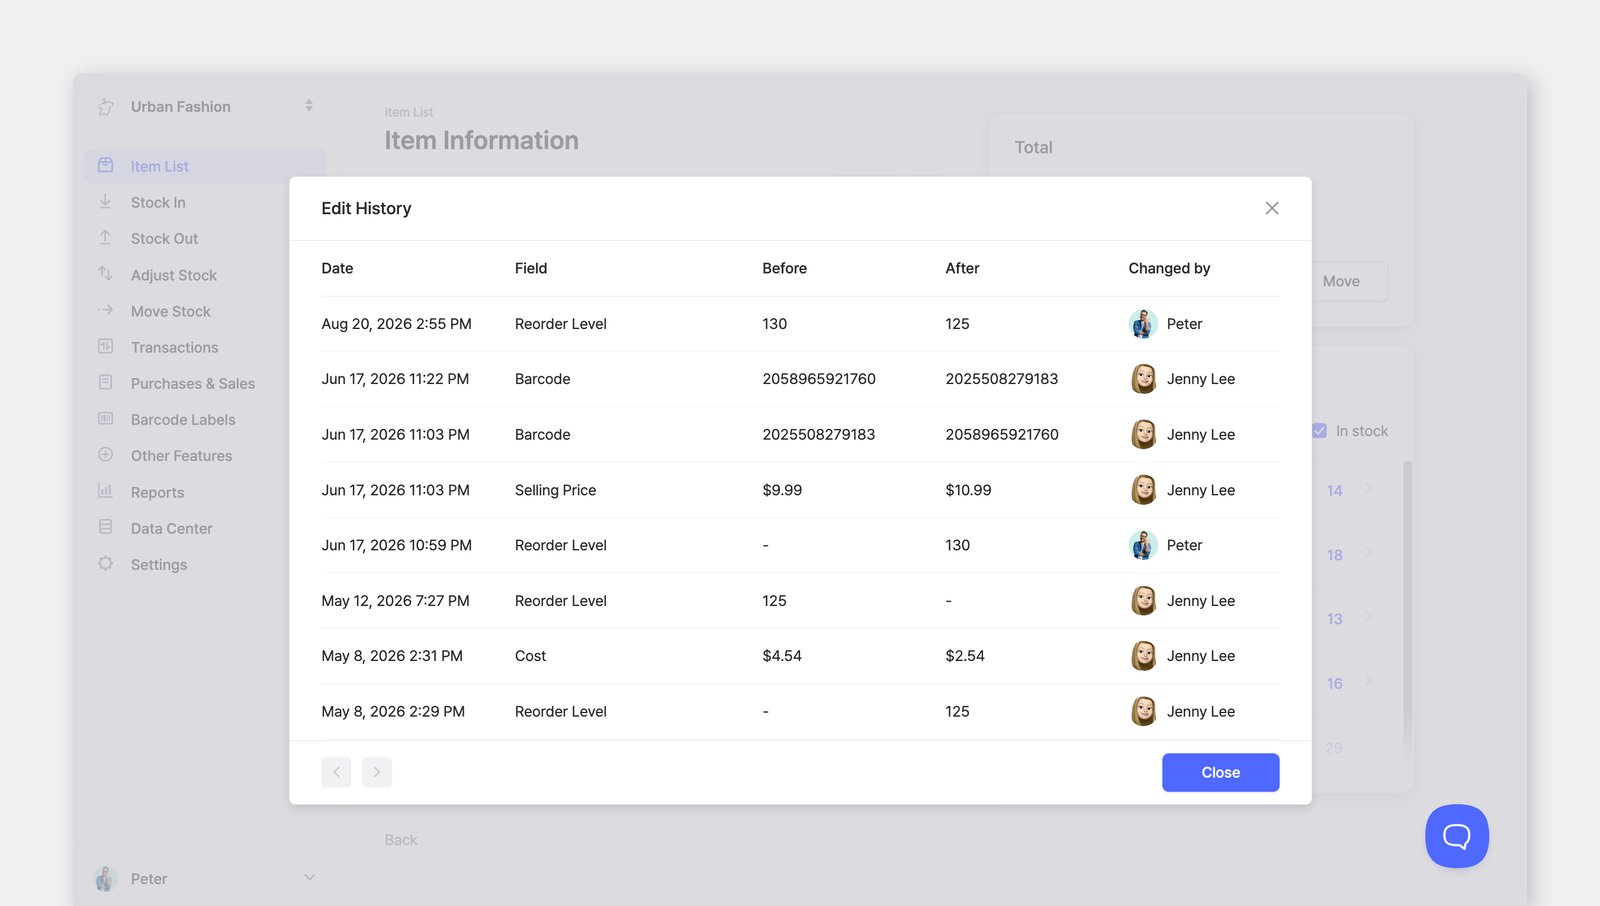
Section titled “Edit History”Select an item in your Item List > ··· (more) > Edit History.
You can view the edit history of an item's information — SKU, Name, Barcode, Cost, Price and any custom attributes.
Deleting Items
Section titled “Deleting Items”Delete Multiple Items
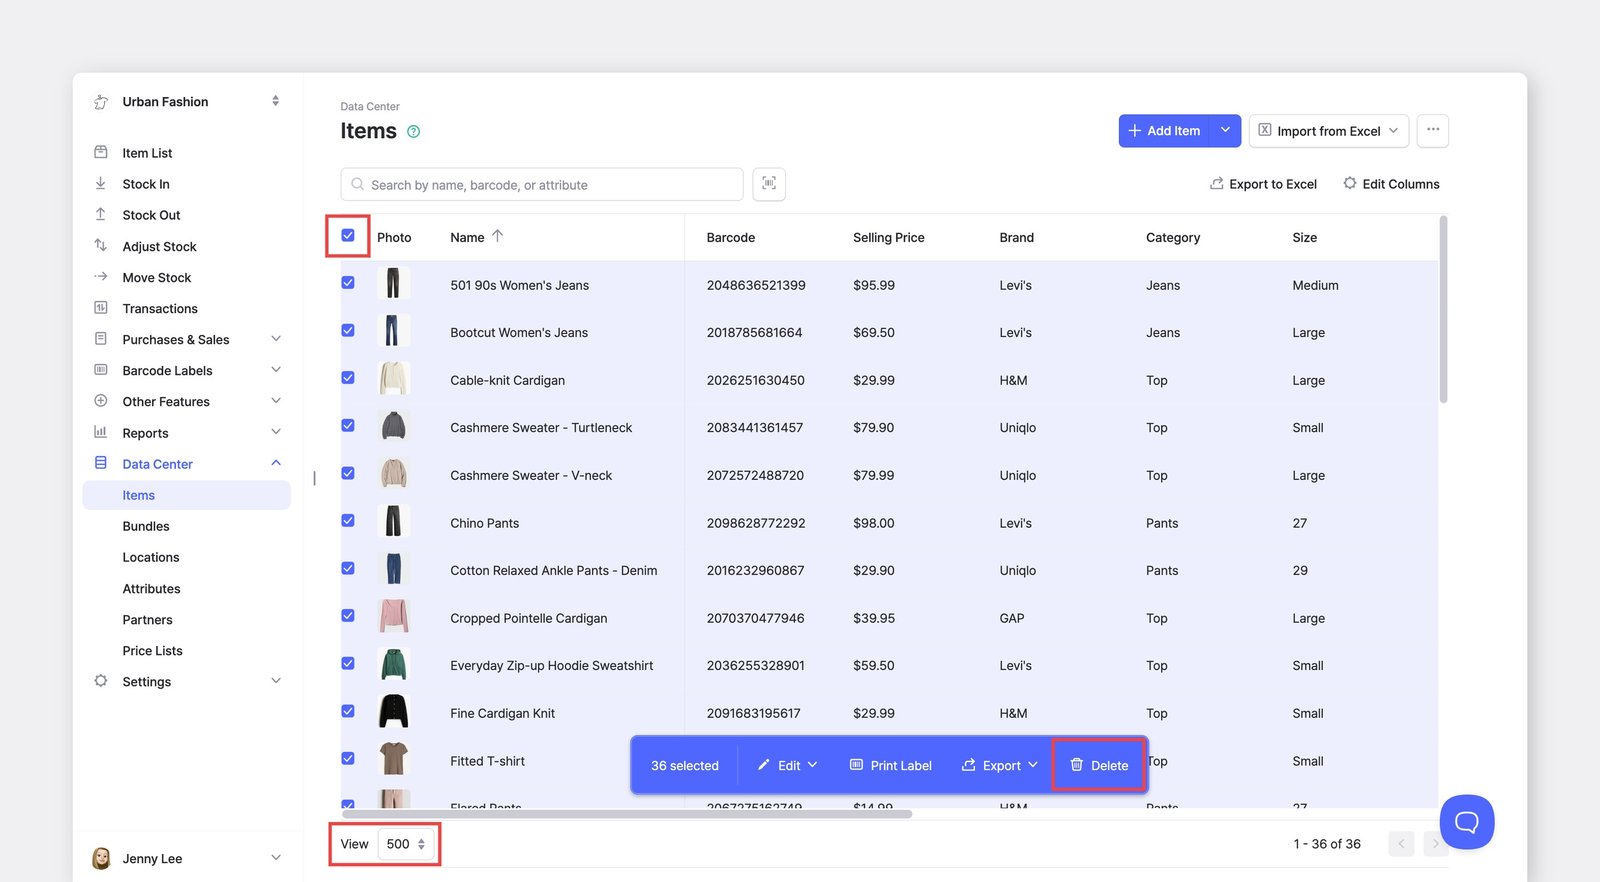
Section titled “Delete Multiple Items”To delete items in bulk, go to Data Center > Items.
You can change the View settings at the bottom to show 500 items per page, then select all and delete them in batches of 500.
Recover Deleted Items
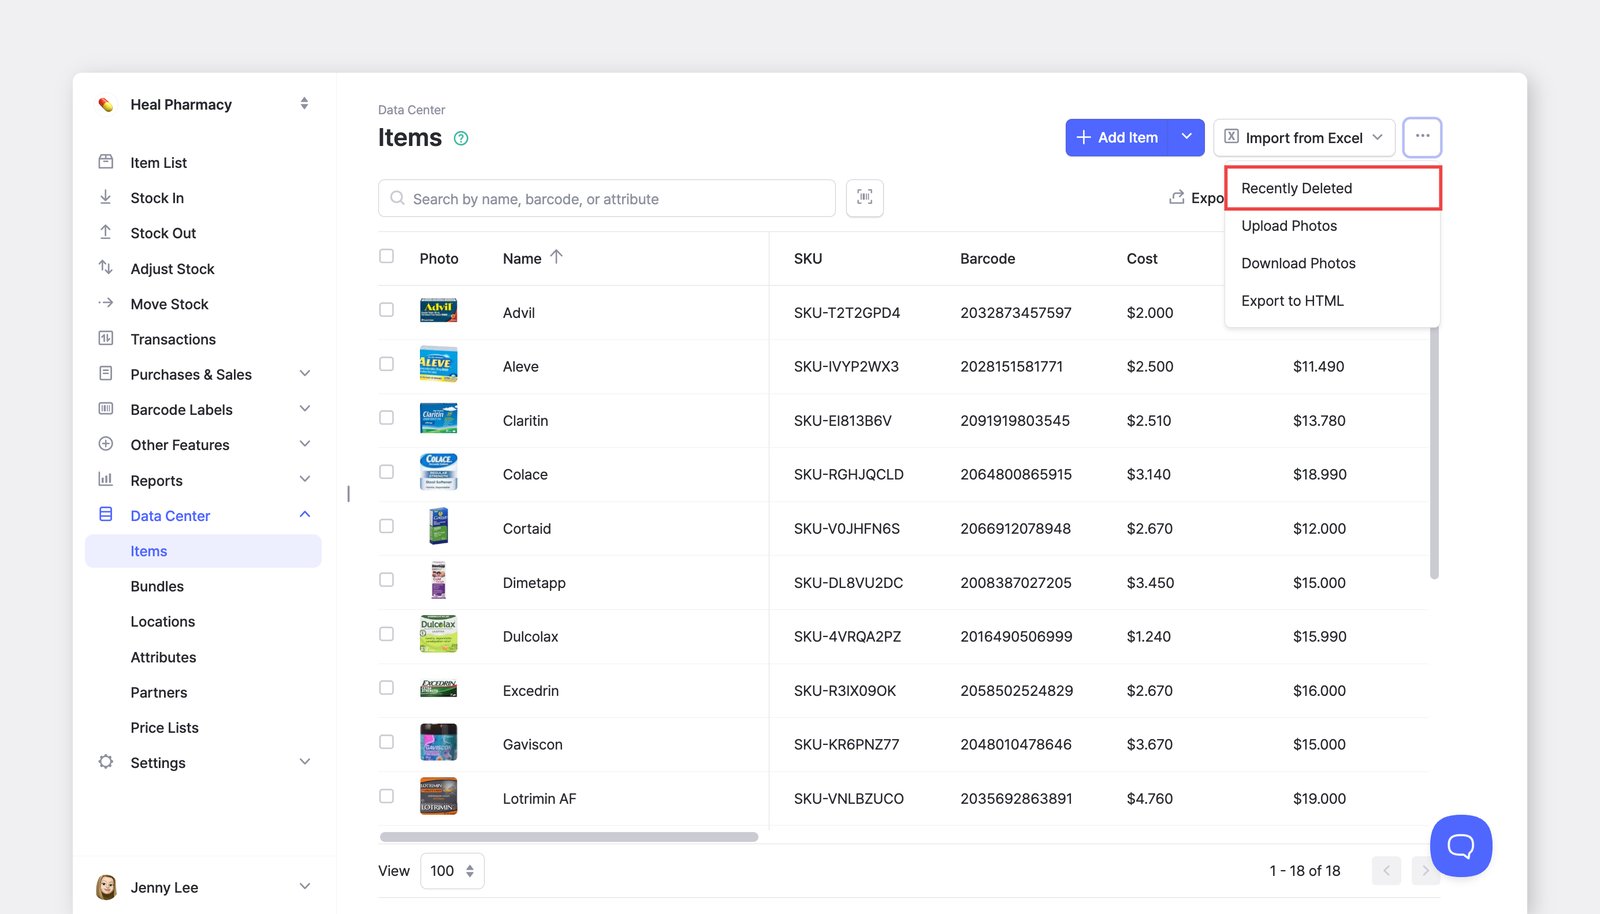
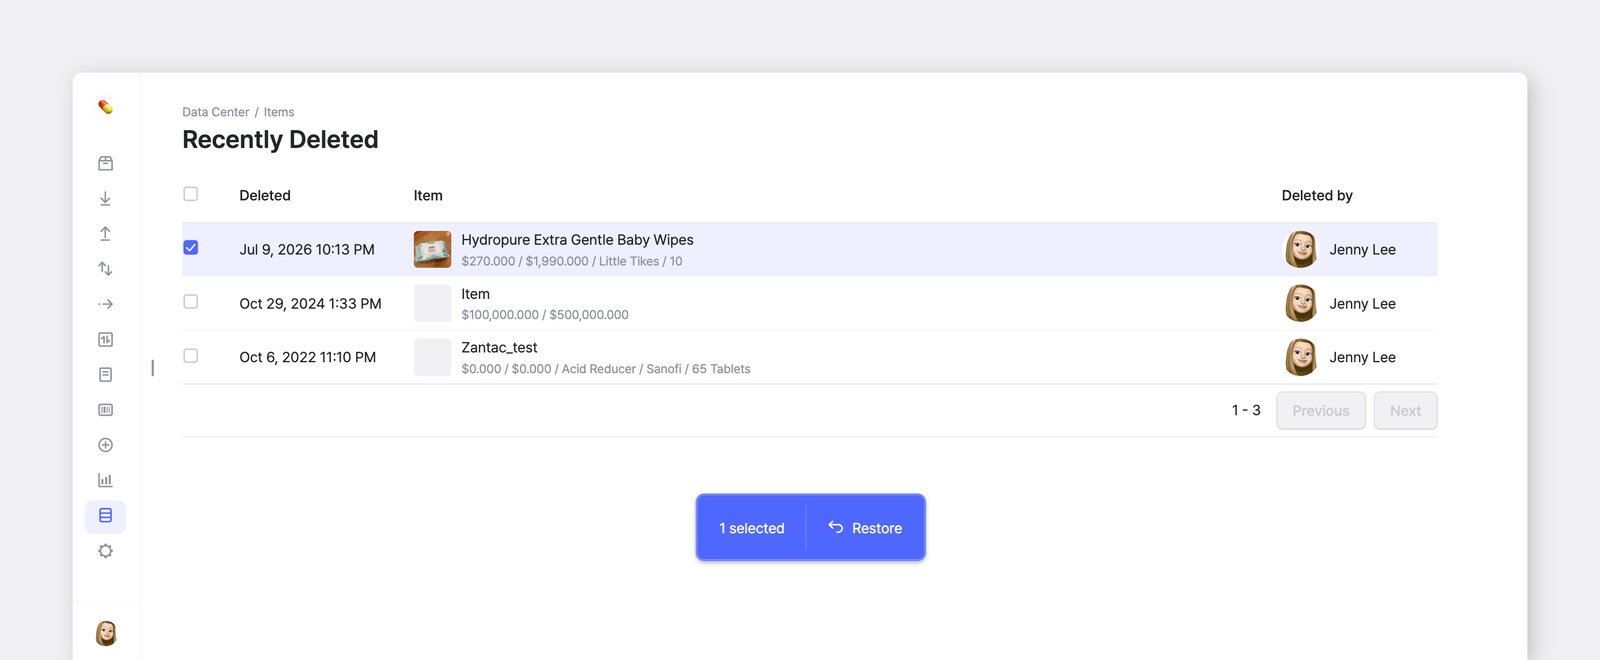
Section titled “Recover Deleted Items”If you accidentally deleted an item, you can recover it by going to Data Center > Items > ... > Recently Deleted > Restore.
Managing Item Photos
Section titled “Managing Item Photos”Upload Photos in Bulk
Section titled “Upload Photos in Bulk”You can upload multiple item photos at once under Data Center > Items > ... (more) > Upload Photos.
- Make sure each file name matches the SKU (or barcode) of its item.
- Drag and drop the photo files into BoxHero.
- Click
Submitto finish.
Download Photos in Bulk
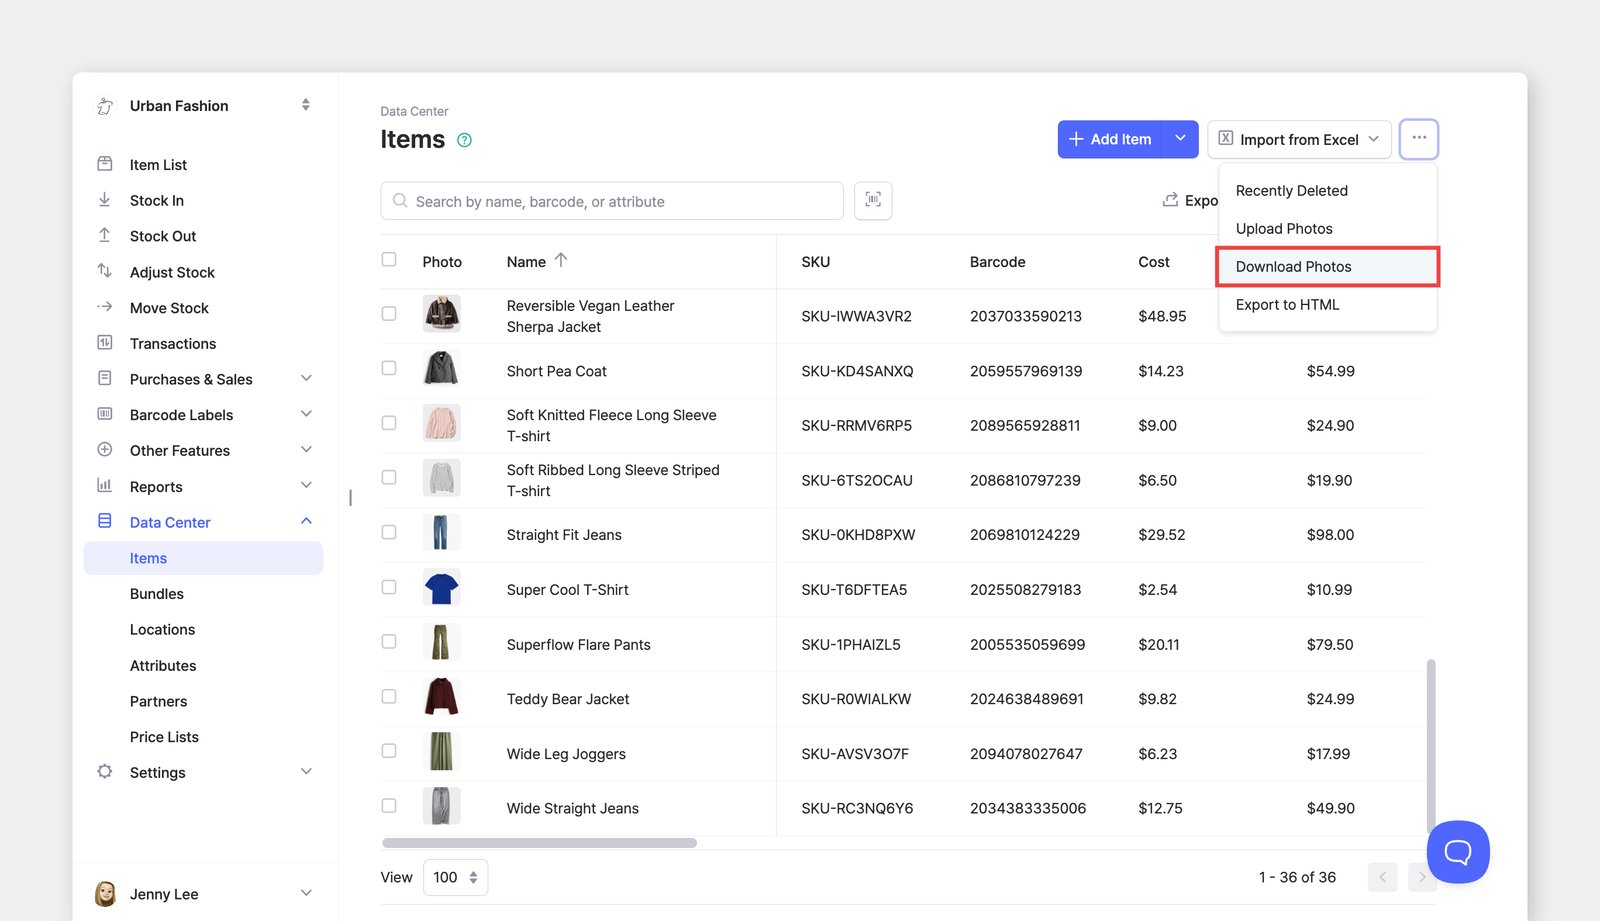
Section titled “Download Photos in Bulk”You can download all item photos as a single compressed file under Data Center > Items > ... (more) > Download Photos.
Exporting Items
Section titled “Exporting Items”Export Item Details
Section titled “Export Item Details”Download your item data as an Excel file under Data Center > Items > Export to Excel.
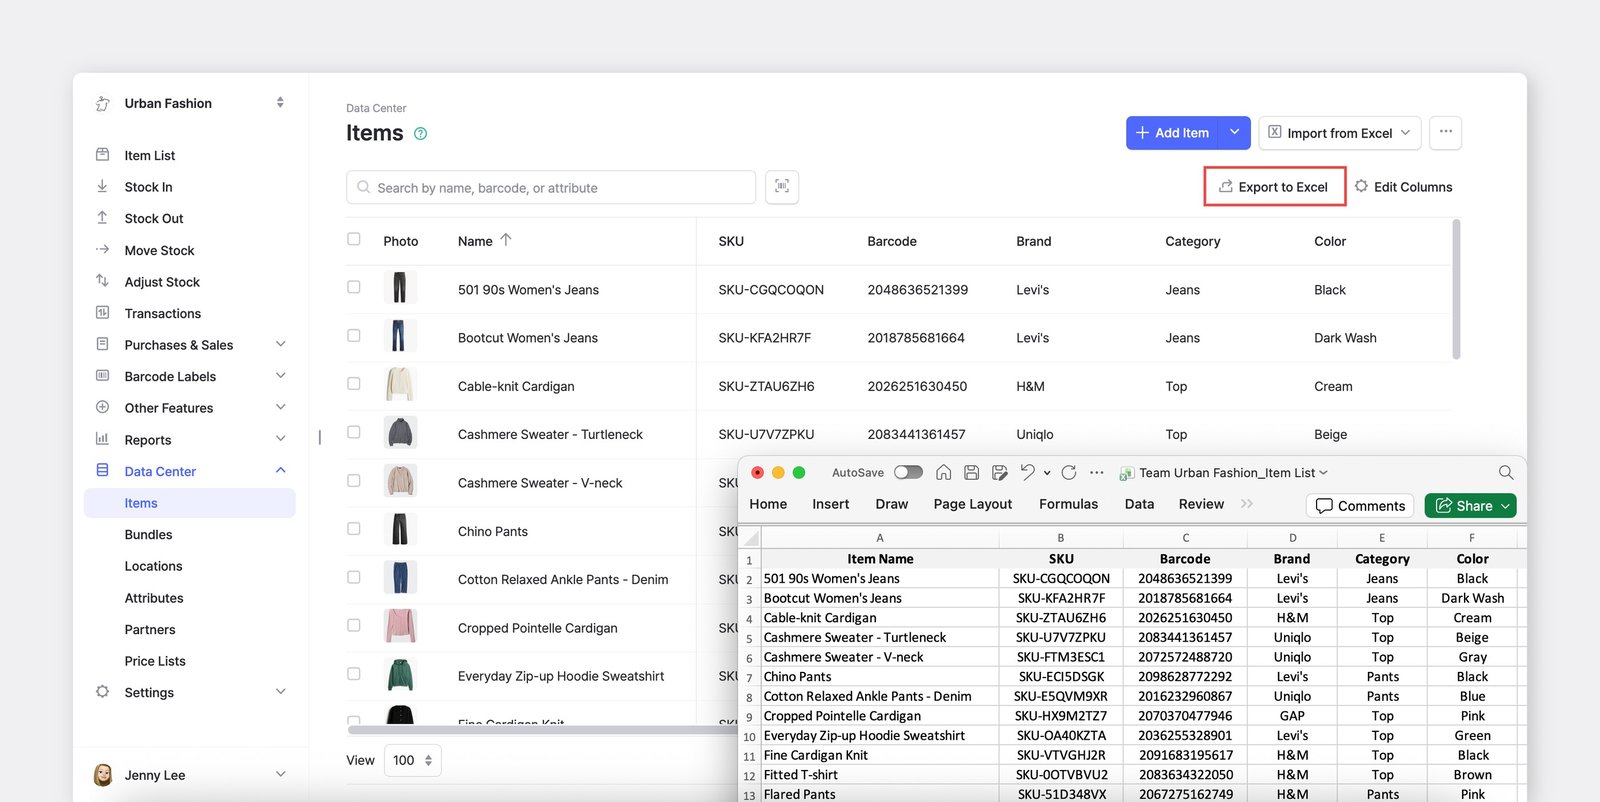
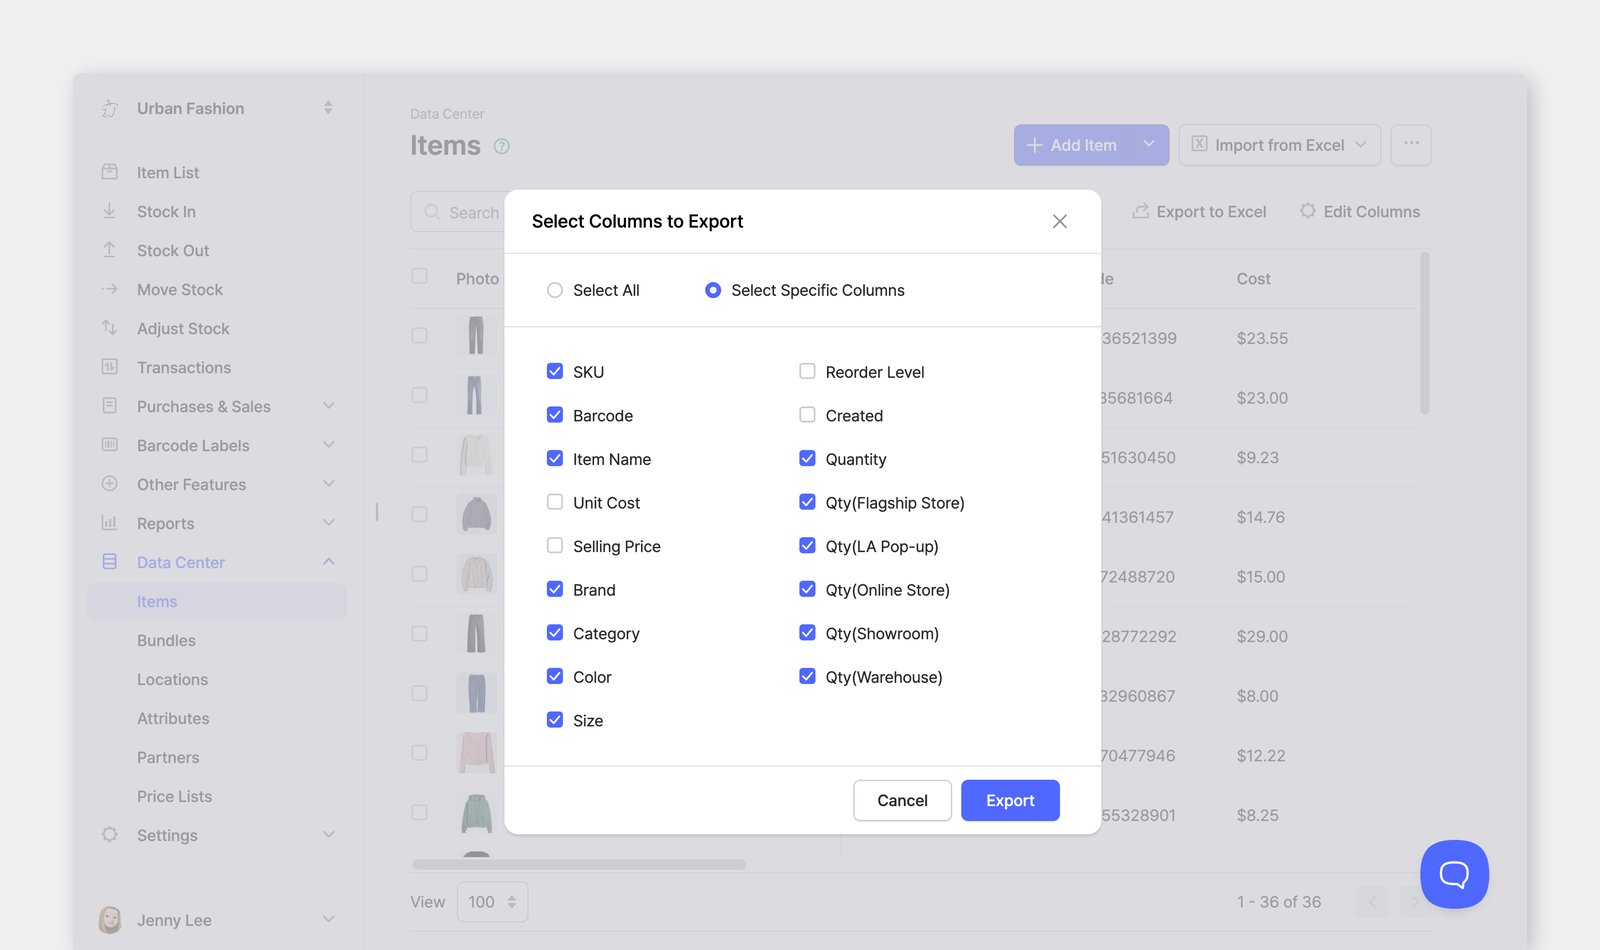
When you export to Excel, you can include every column or pick specific ones. This keeps your file focused on the data you need.
Export Item Photos
Section titled “Export Item Photos”To export your inventory list with item photos and barcode images, go to Data Center > Items > ... (more) at the top right > Export to HTML.
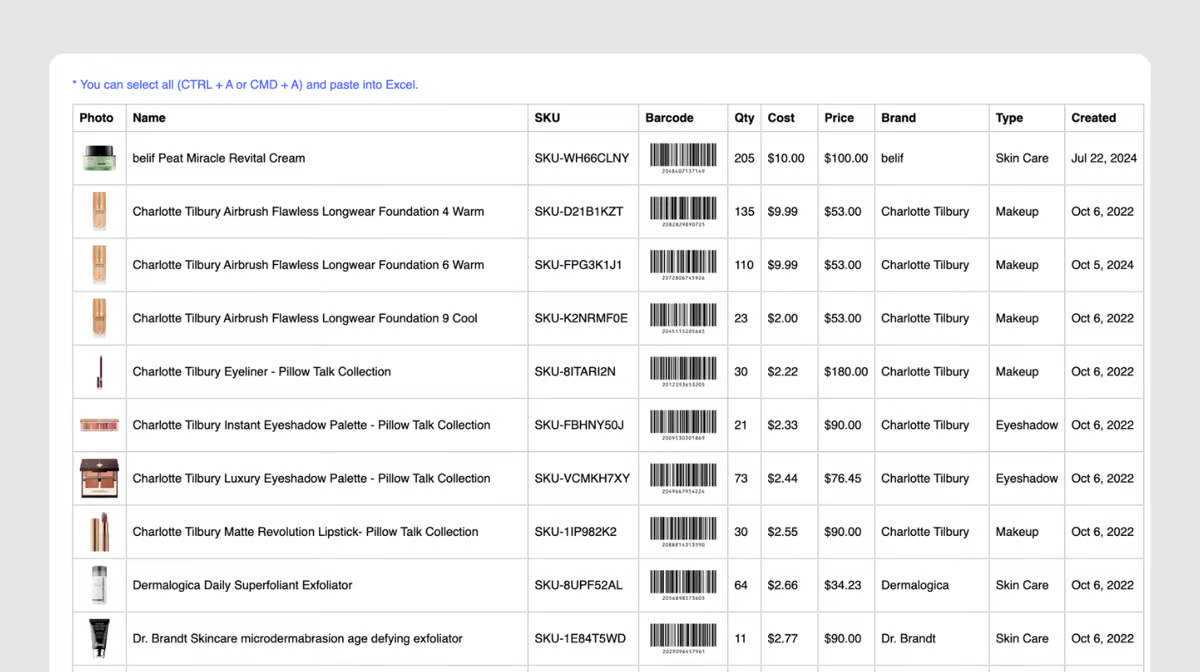
- Press
Ctrl + Ato select all items. (Mac: Command + A) - Press
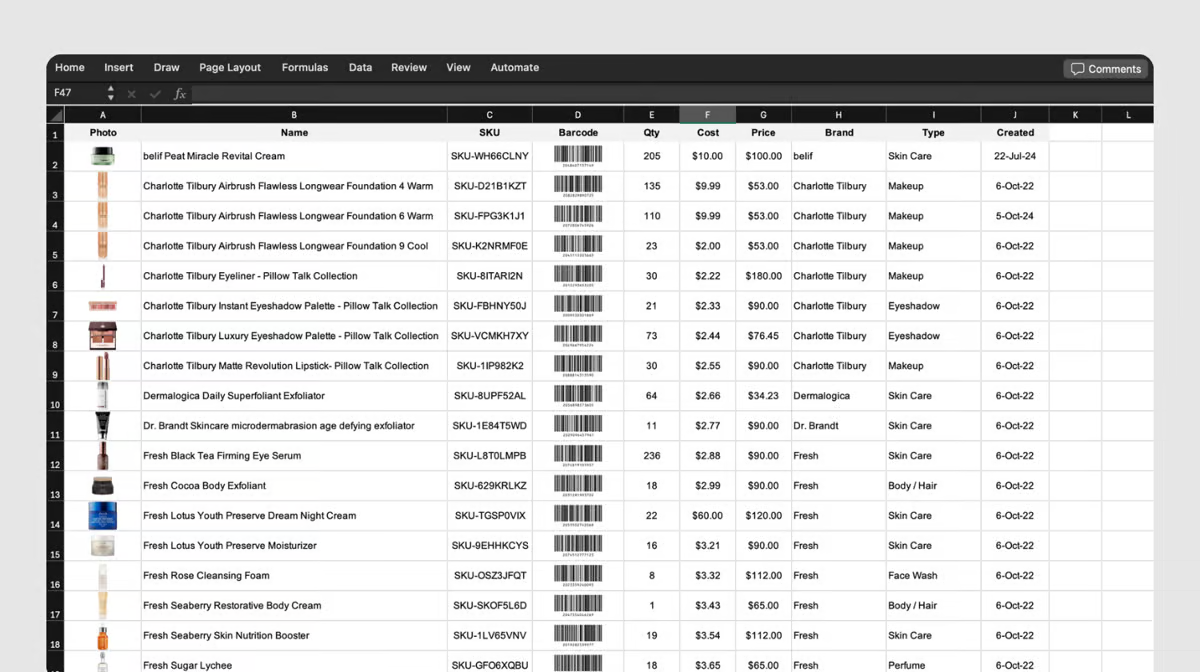
Ctrl + Cto copy the data. (Mac: Command + C) - Open an Excel file and press
Ctrl + Vto paste. (Mac: Command + V) - Save the file, which now includes item photos and barcode images.
Frequently Asked Questions
Section titled “Frequently Asked Questions”Still need help? Check out our FAQ on managing items.